Guides
How to read basket needs and change their priority
A product in your Invemory basket may be needed in several places. Learn to distinguish the total quantity to acquire from a location’s stock, recognize the three priorities and check their changes. These steps apply to the website and Android app.
Last checked:
What you need
- Sign in to Invemory and open Basket from the main menu. To follow the stock example, use an existing need with a target location and desired stock.
- Change priorities where you have editing access. A shared container may offer view access only.
1. Check the product, location and quantity to acquire
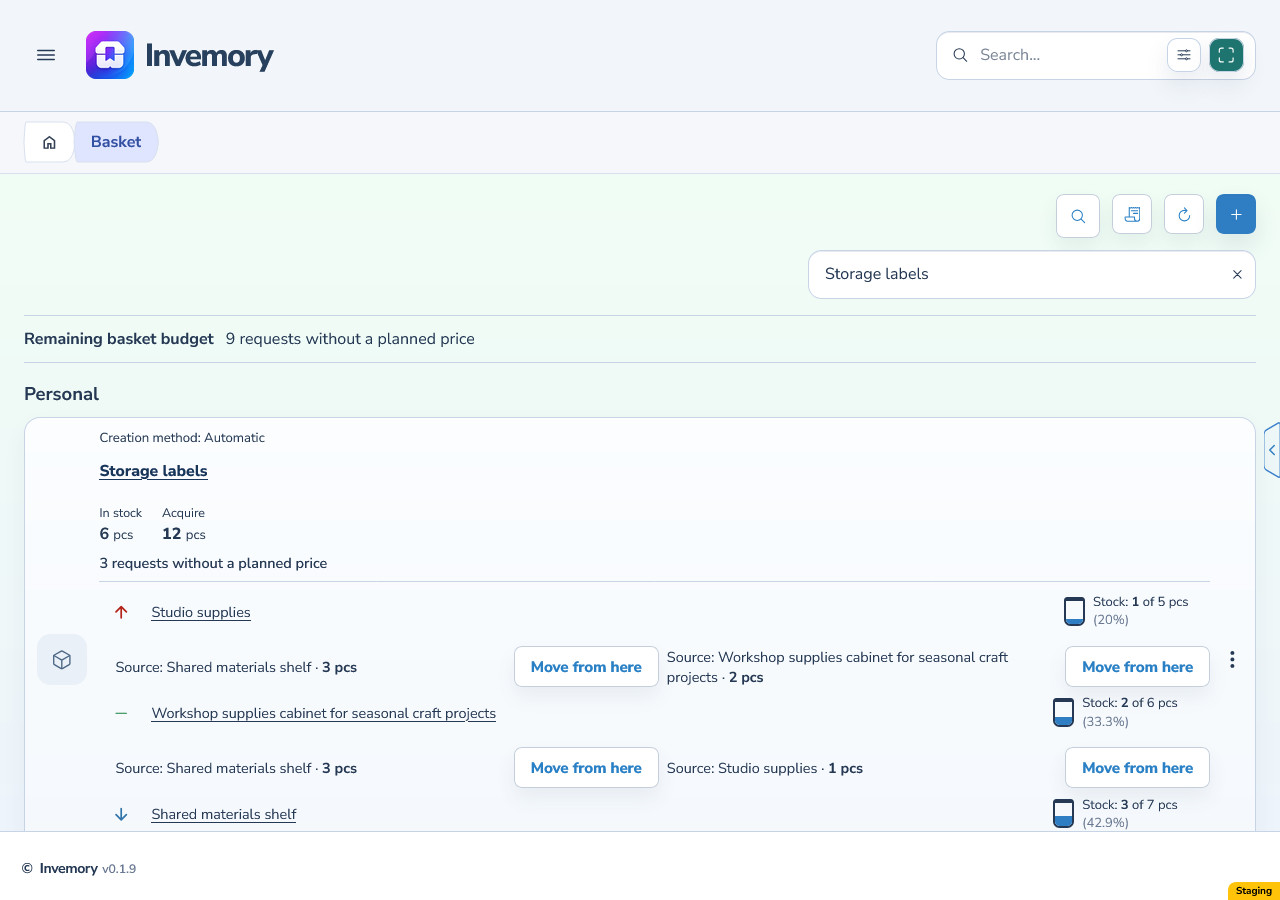
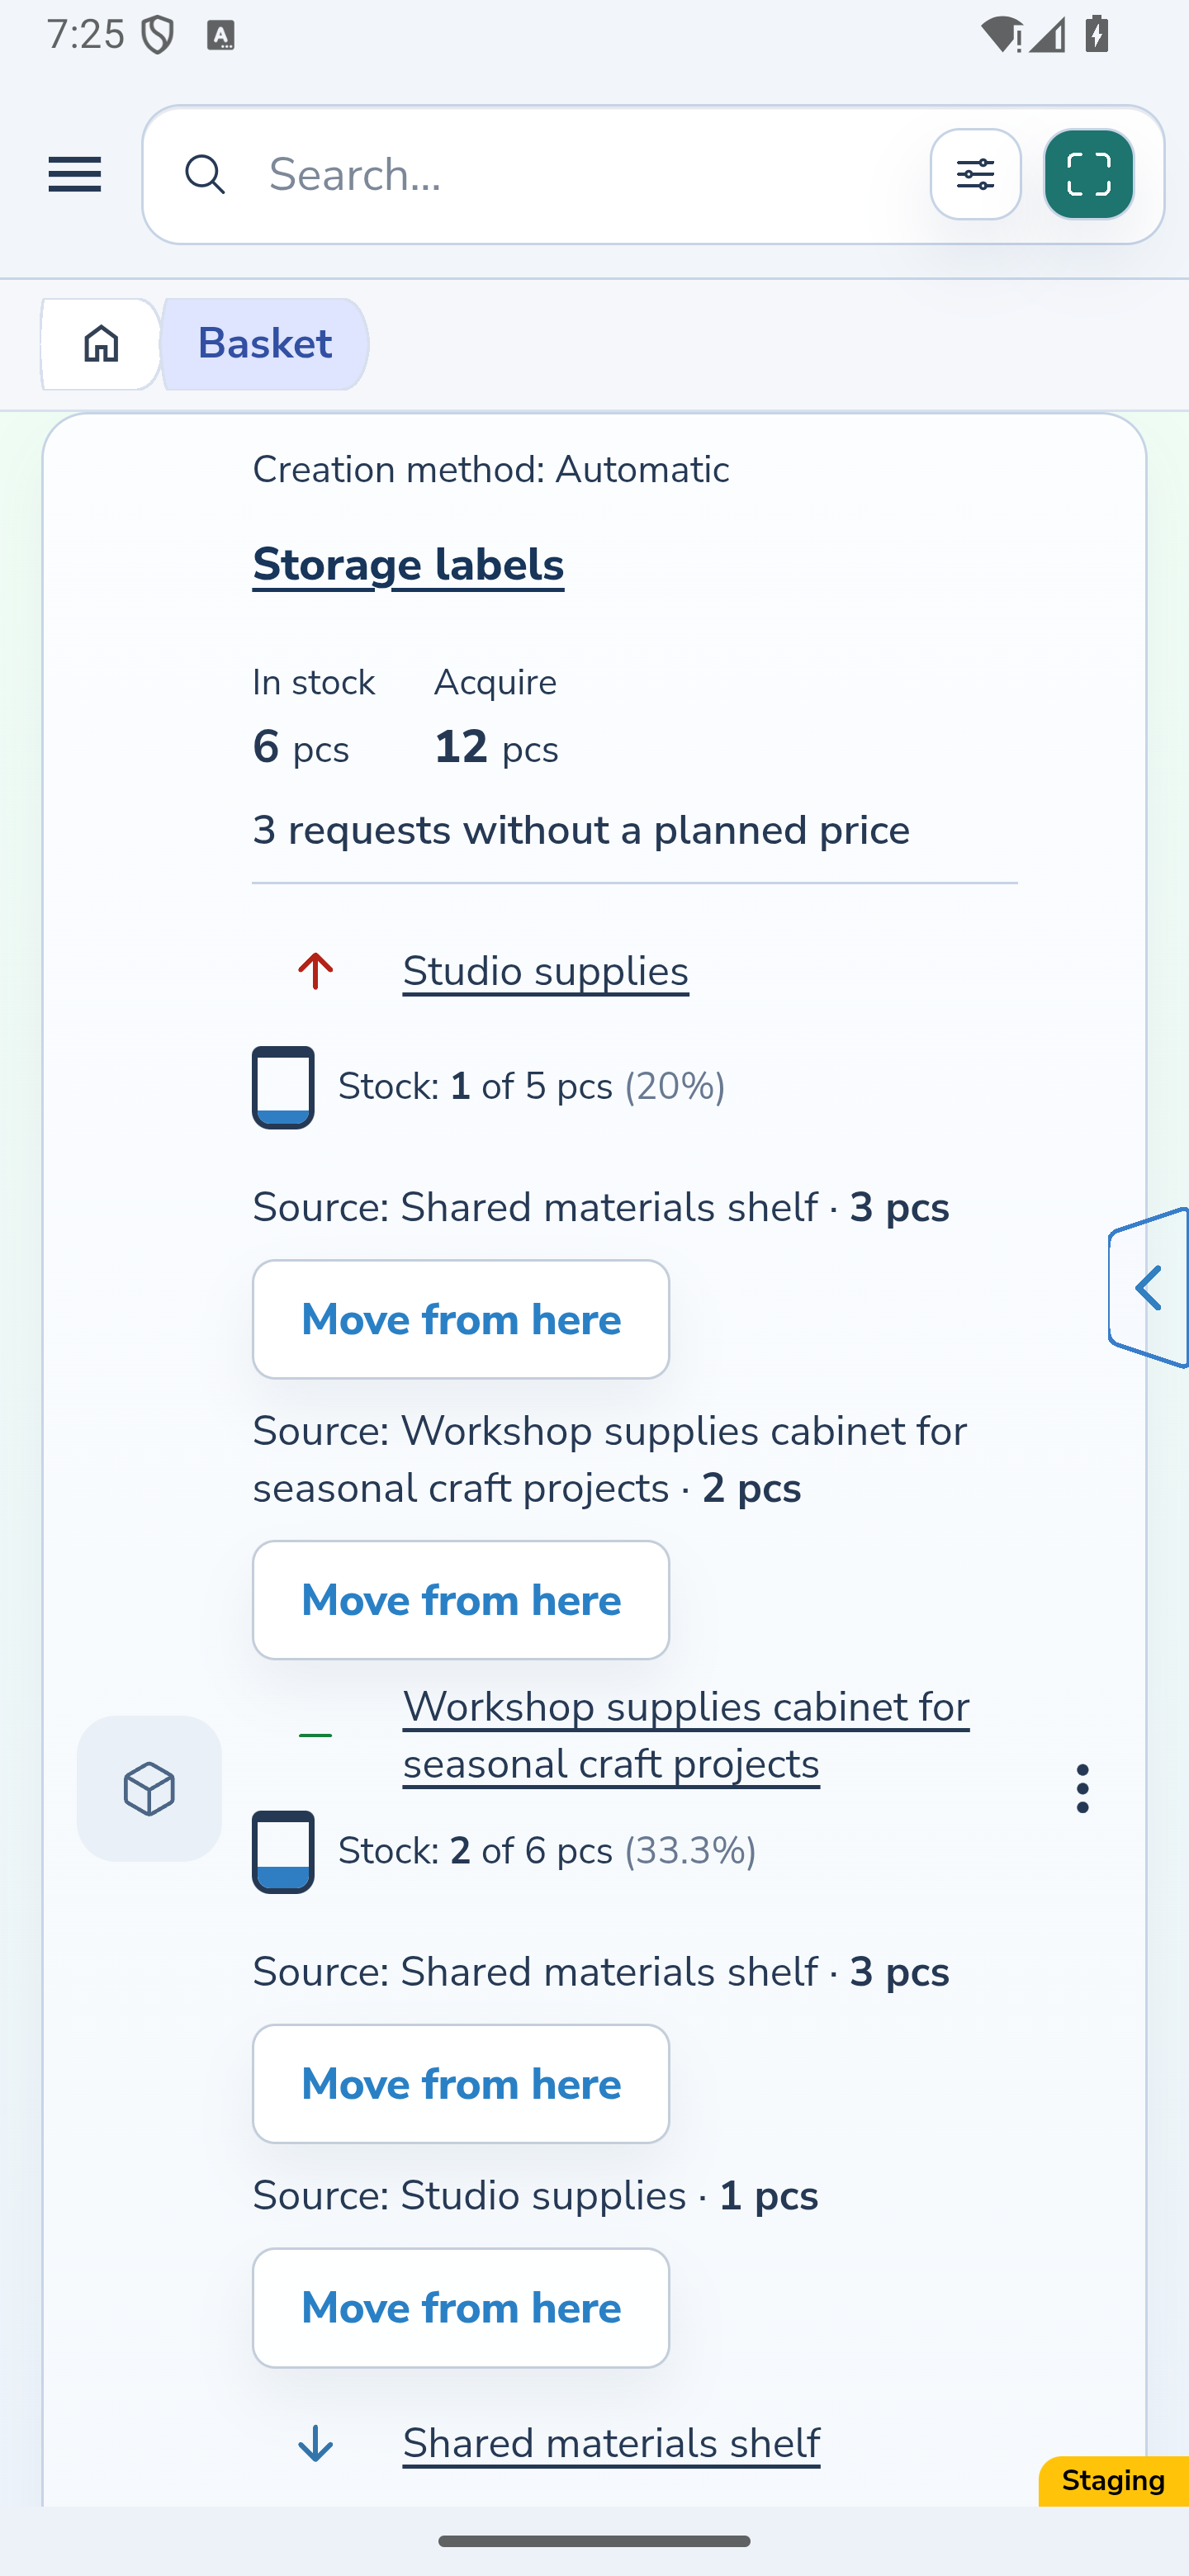
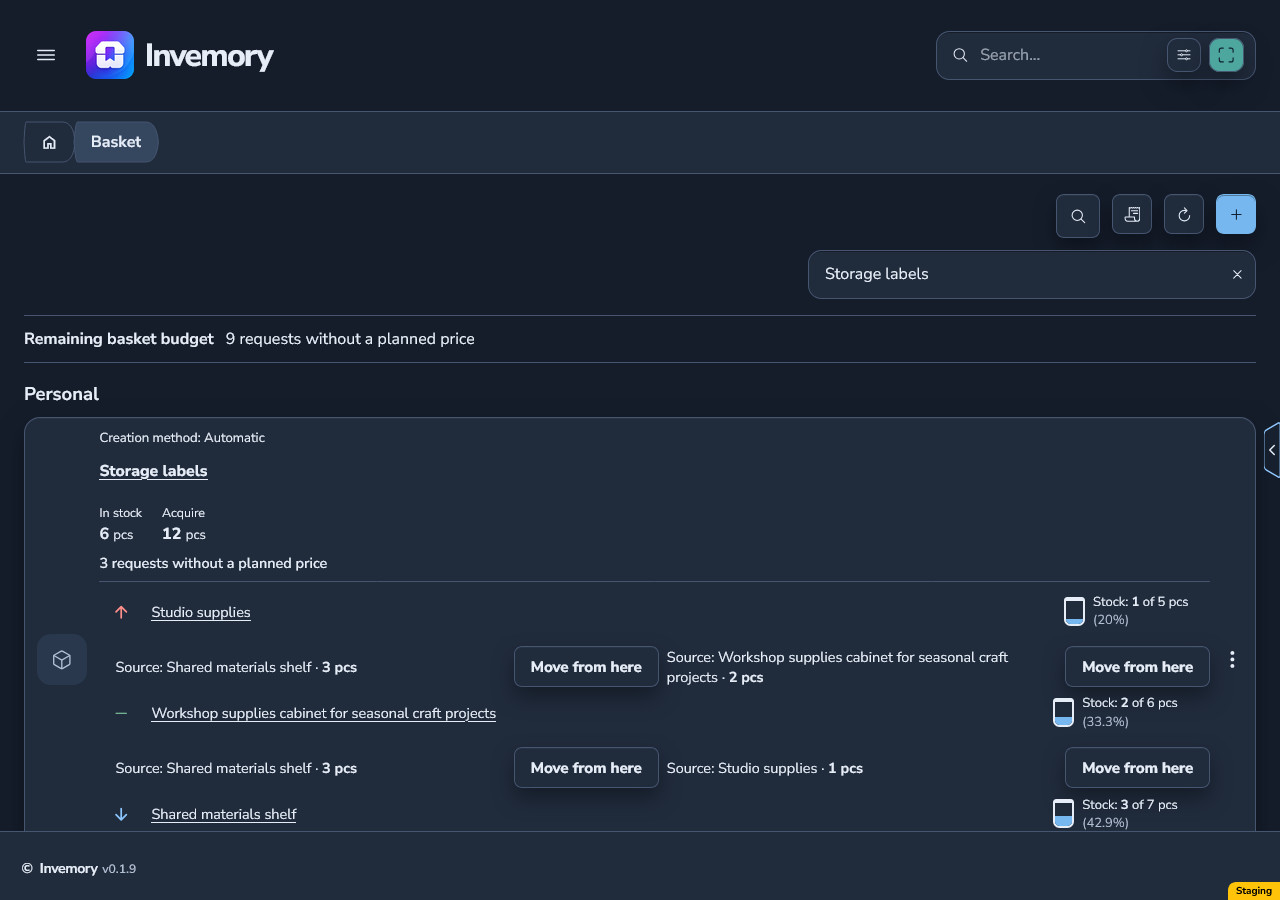
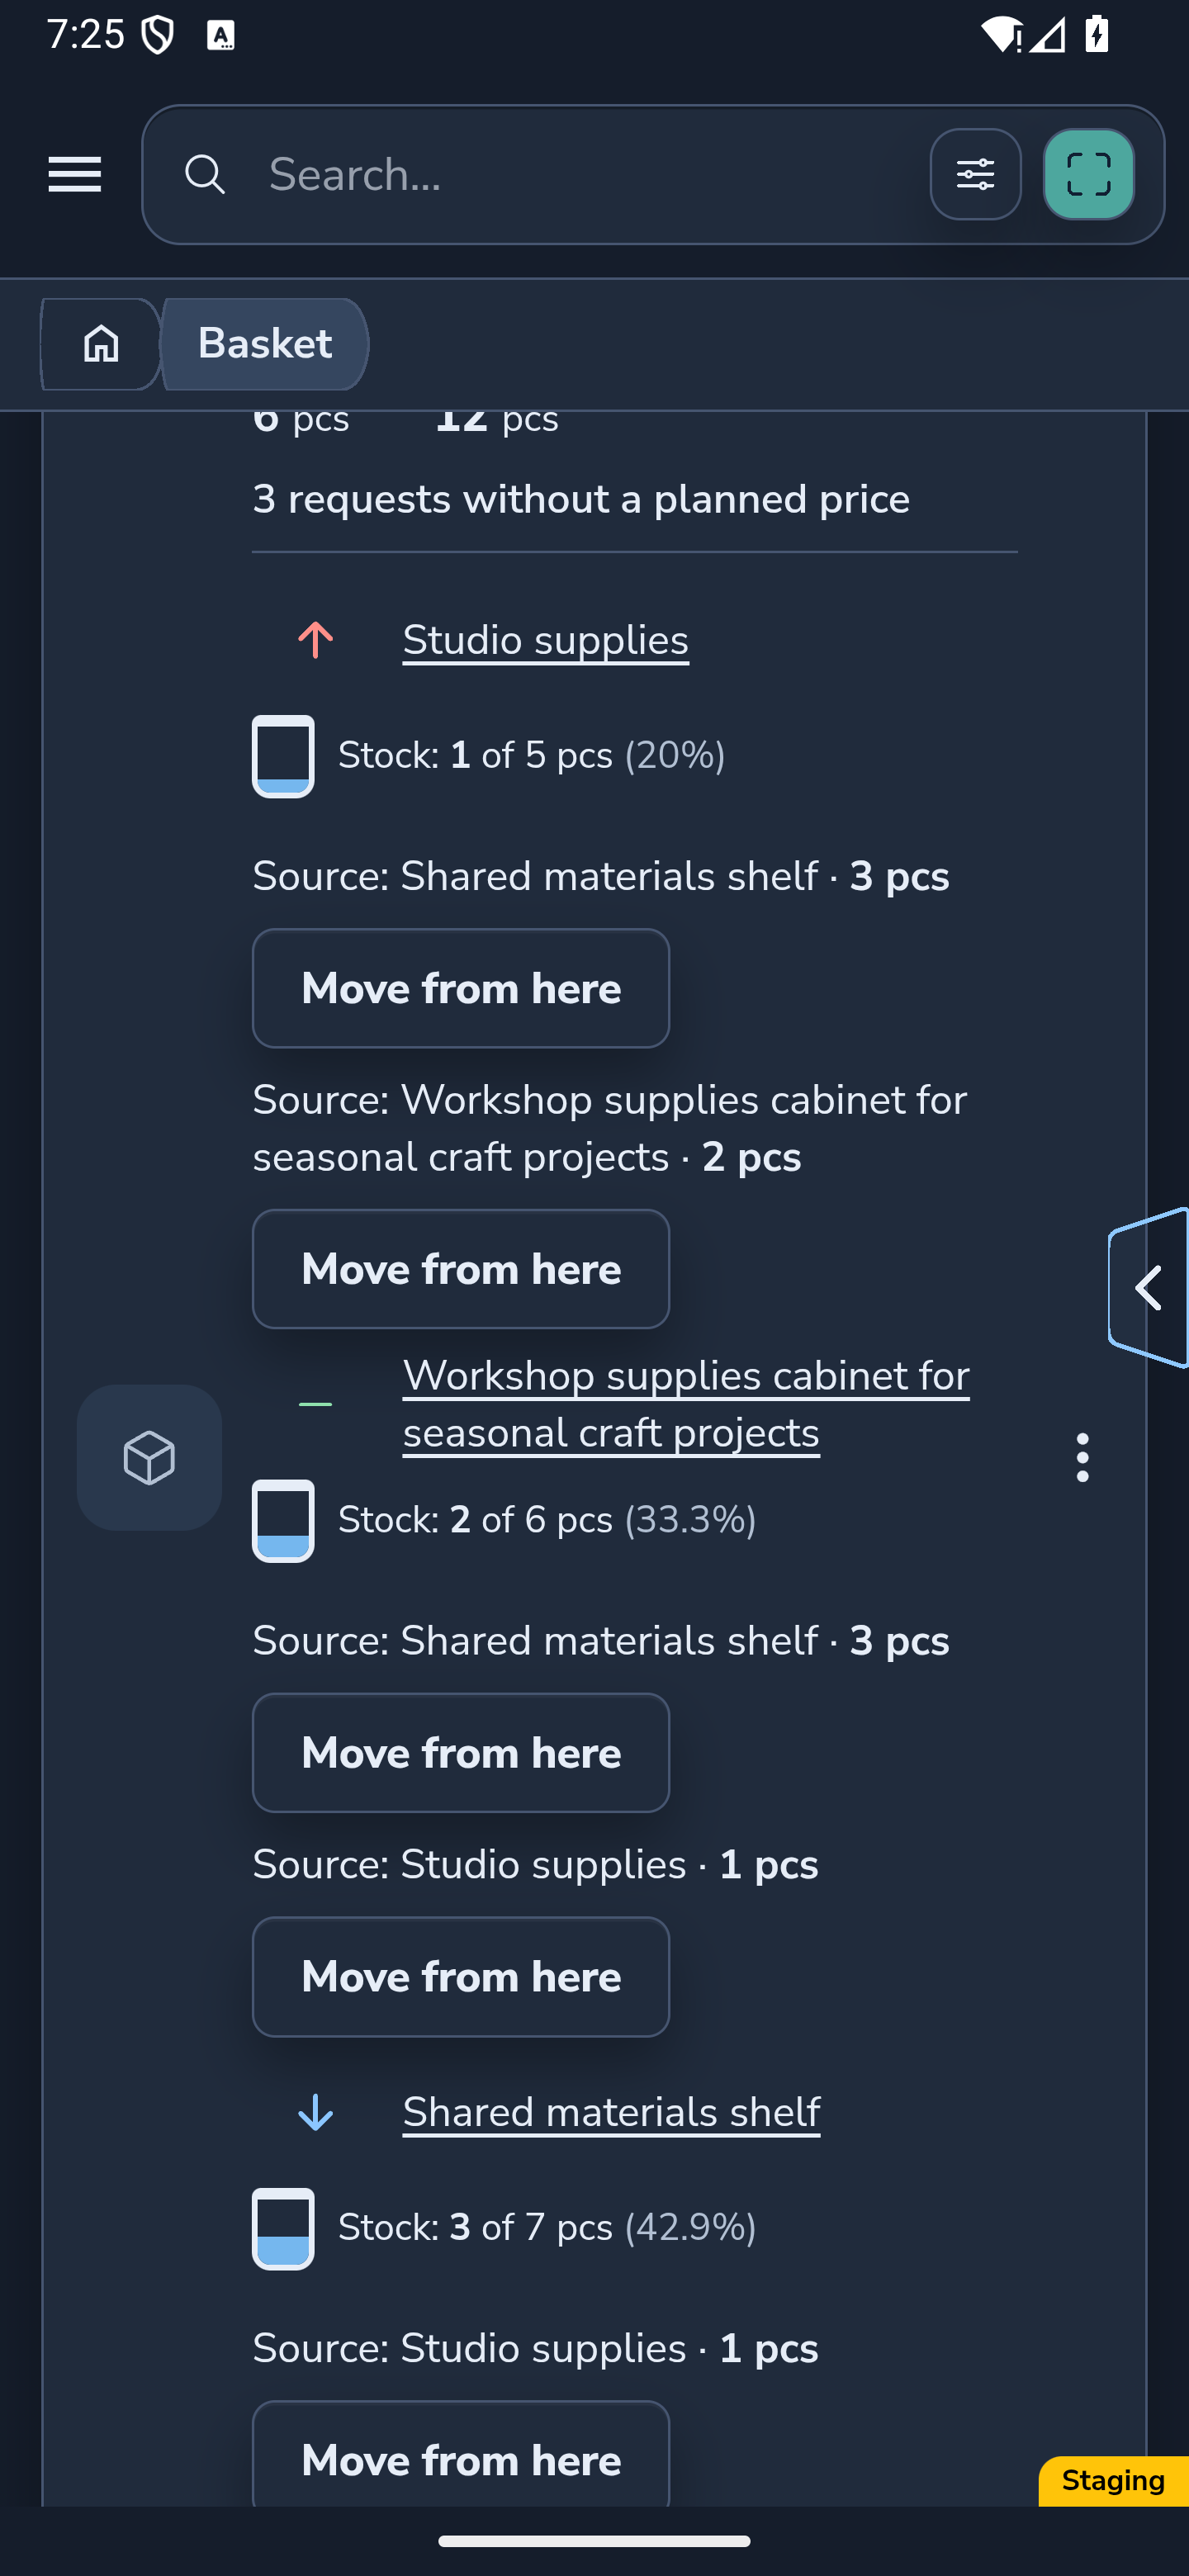
Find the product under To buy. Creation method: Automatic describes the need’s origin. In stock and Acquire appear below the product name, followed by individual target locations and their stock.
In this example, the three locations hold 1, 2 and 3 units, totaling 6. Their desired stocks are 5, 6 and 7, so each location needs 4 more units and the total to acquire is 12. Stock: 2 of 6 means 2 units currently held and a desired stock of 6.
Source rows show available stock in other locations. They do not add extra quantities to acquire. Select an available location link to open it. On a narrow screen, stock may appear below the location name; scroll through the card to read the other targets.
Website
Android
Website
Android
2. Recognize and choose a priority
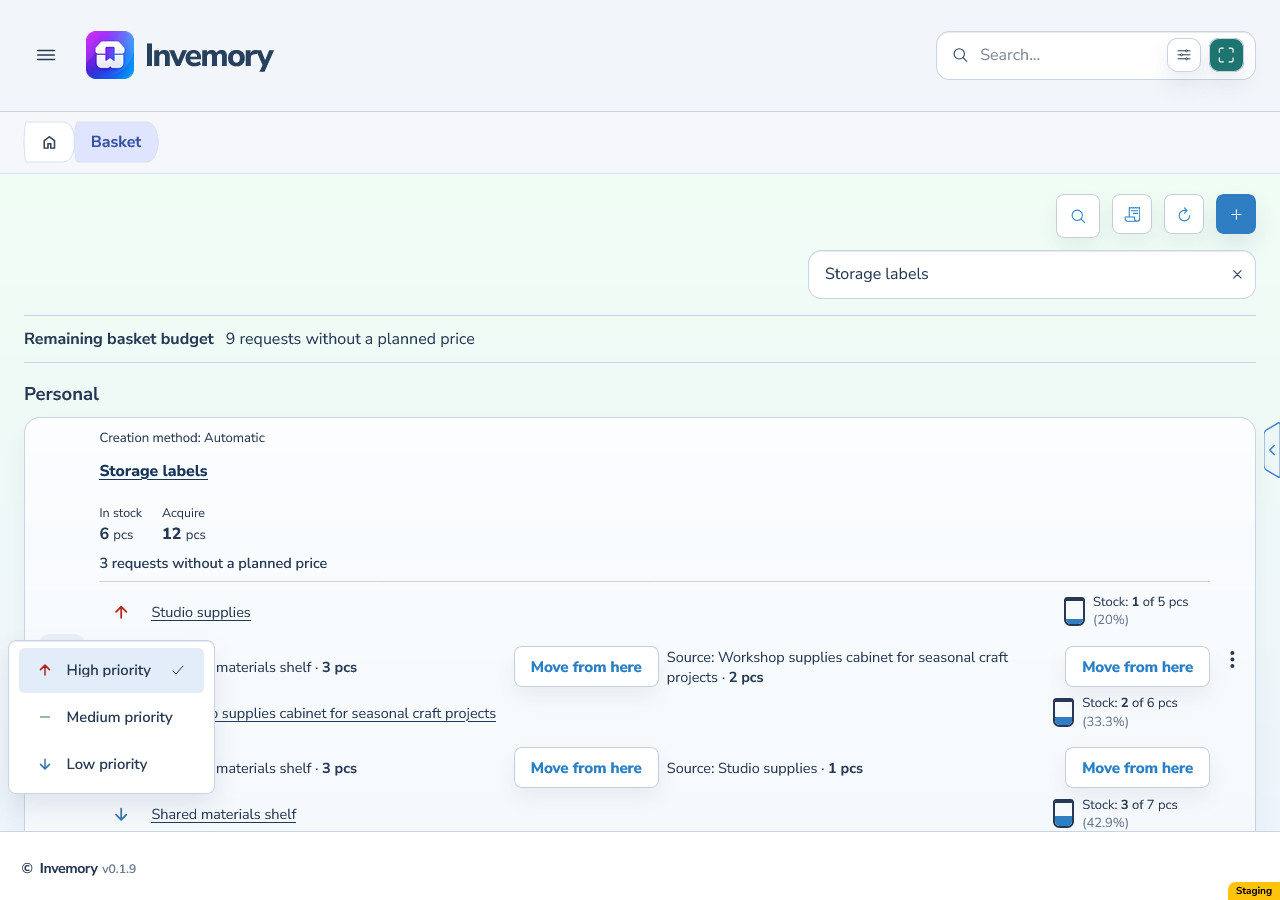
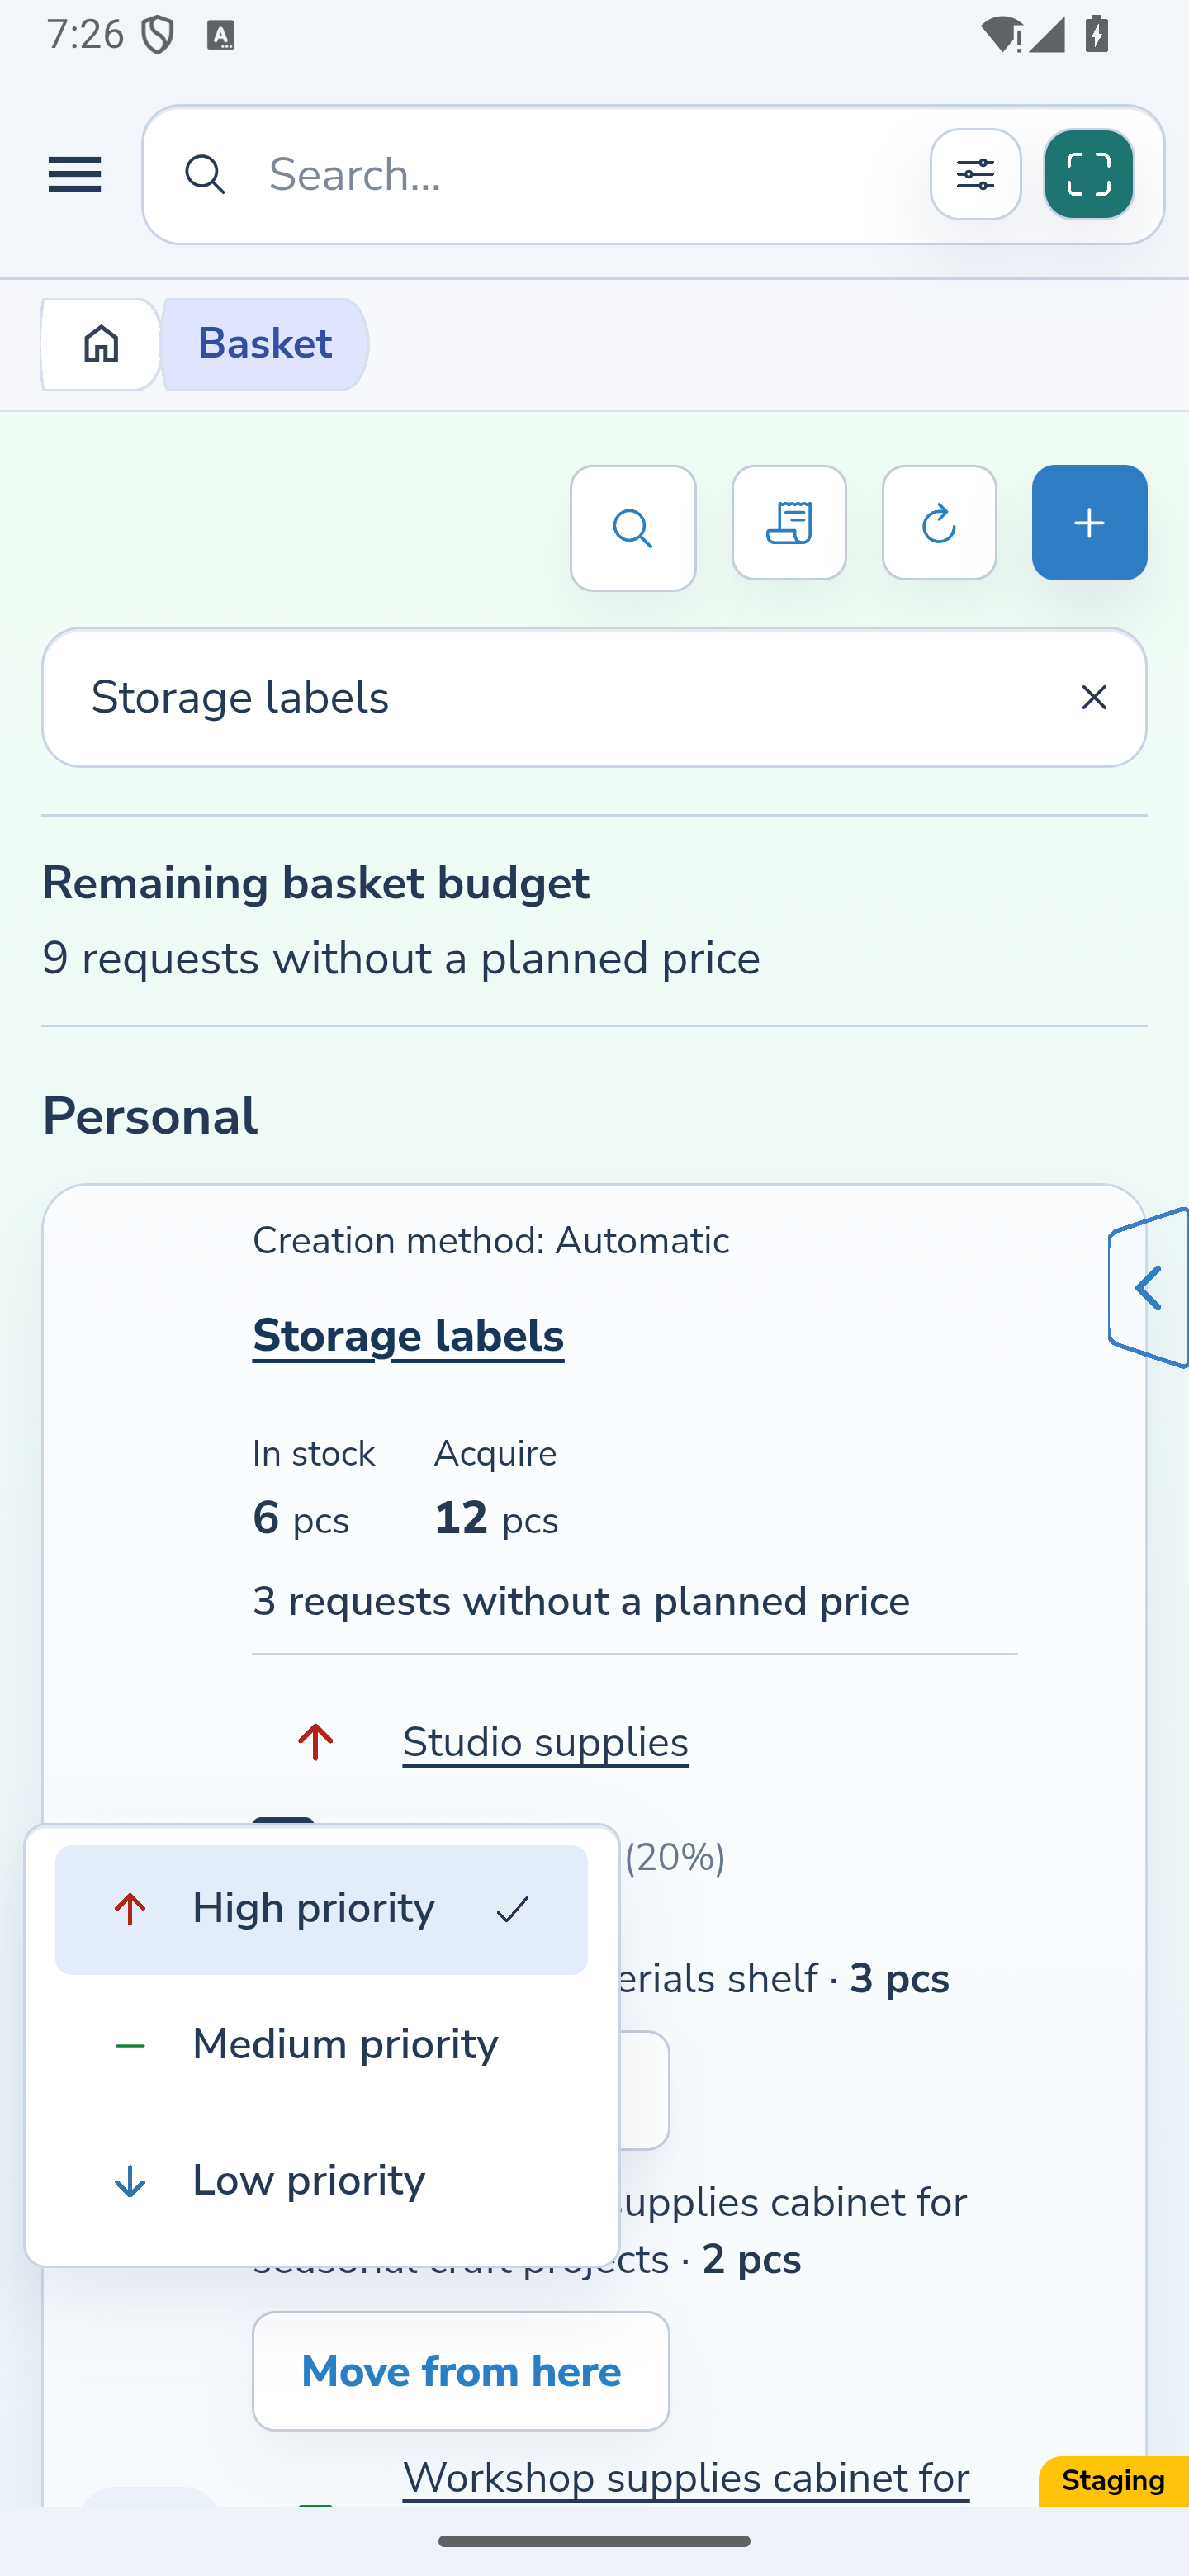
High priority uses an up arrow, Medium priority a dash and Low priority a down arrow. Their standard colors are red, green and light blue, with different shades in Light and Dark themes. Use the name and icon shape as well as the color.
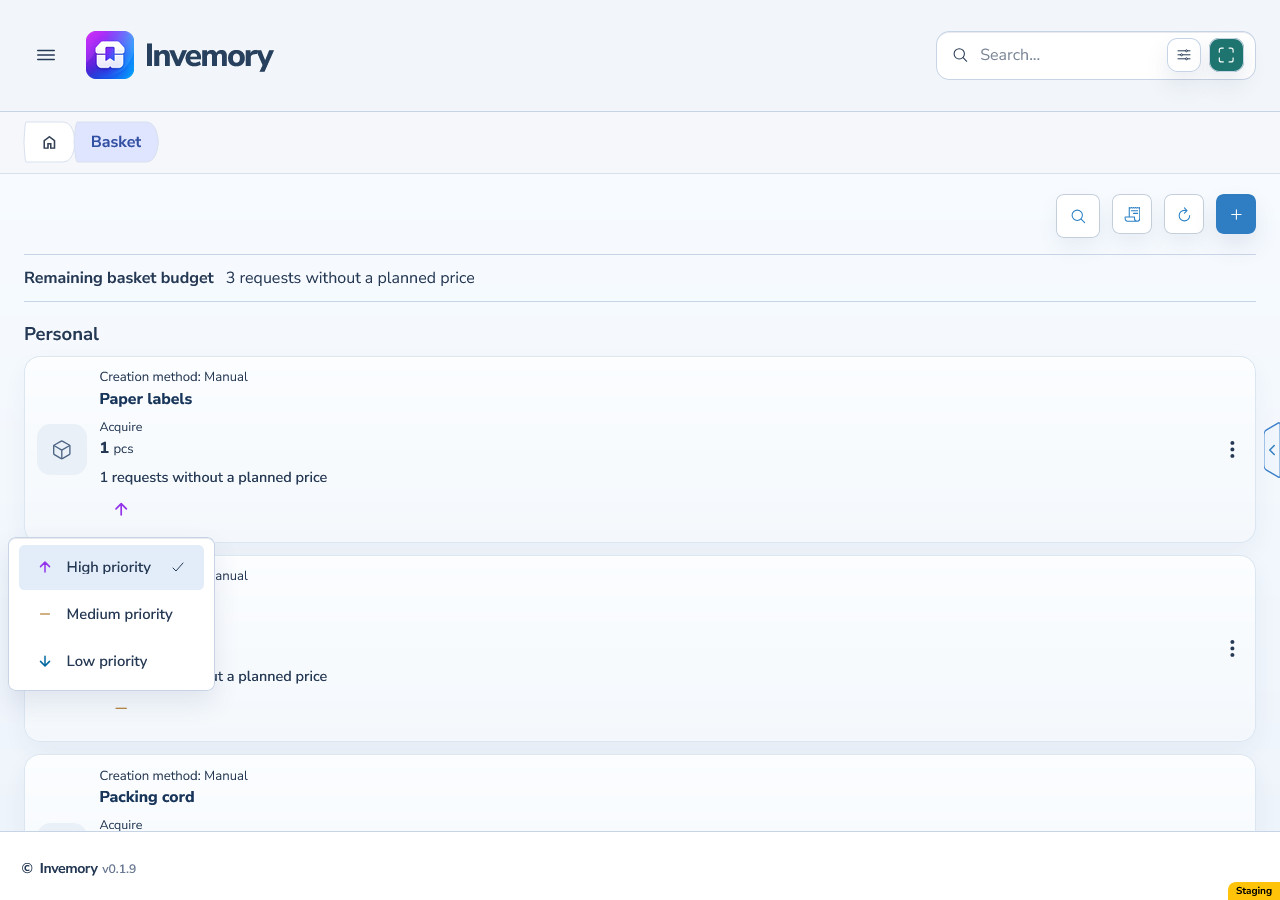
When editing is allowed, select the icon beside the intended location and choose High priority, Medium priority or Low priority. In a grouped automatic card, this changes the selected target need. On the website, hover or keyboard focus shows a short tooltip naming only the priority; opening the menu hides it.
Creation method and priority mode are separate. Choosing a different level sets the priority manually while the need retains its automatic origin.
Website
Android
3. Check the priority in the editor
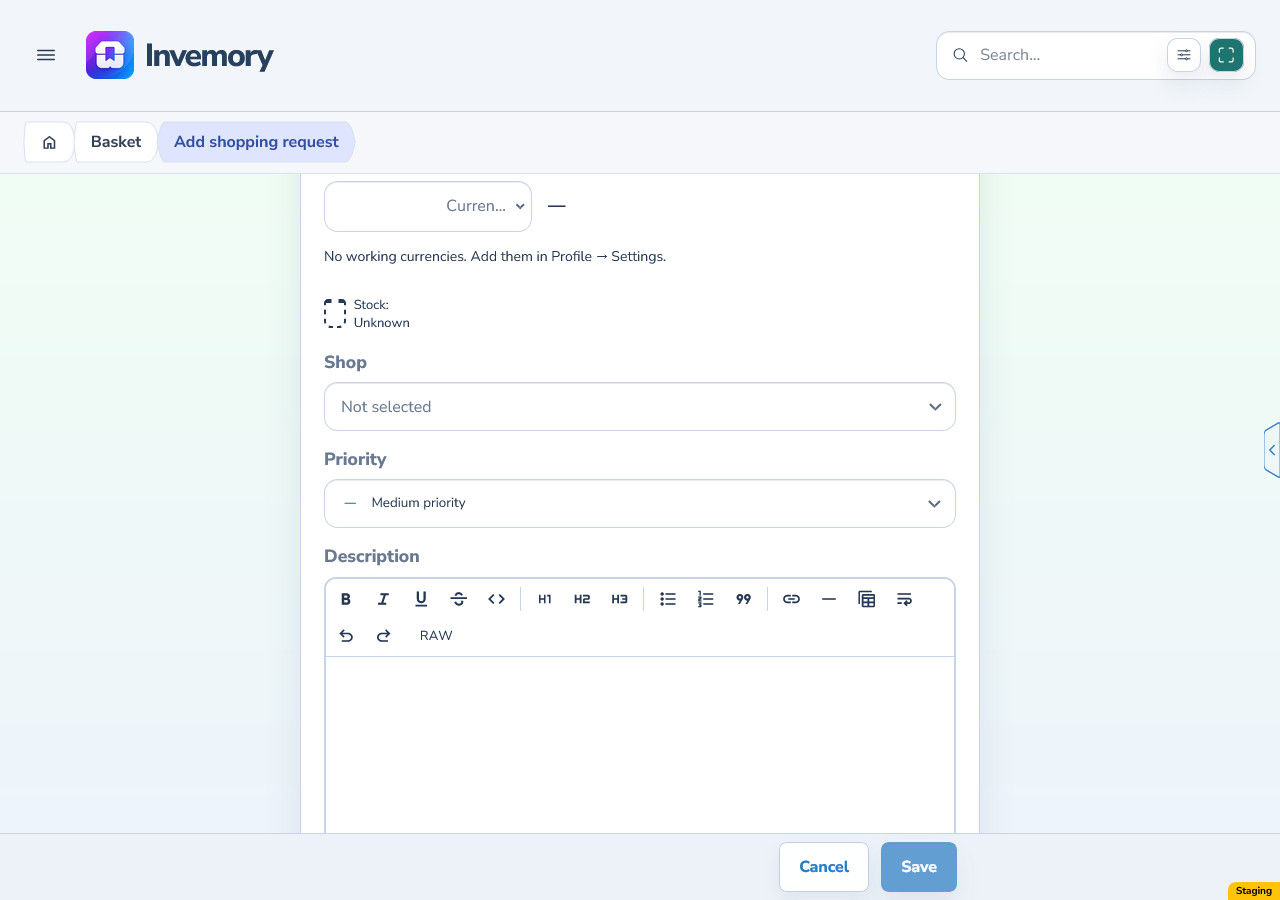
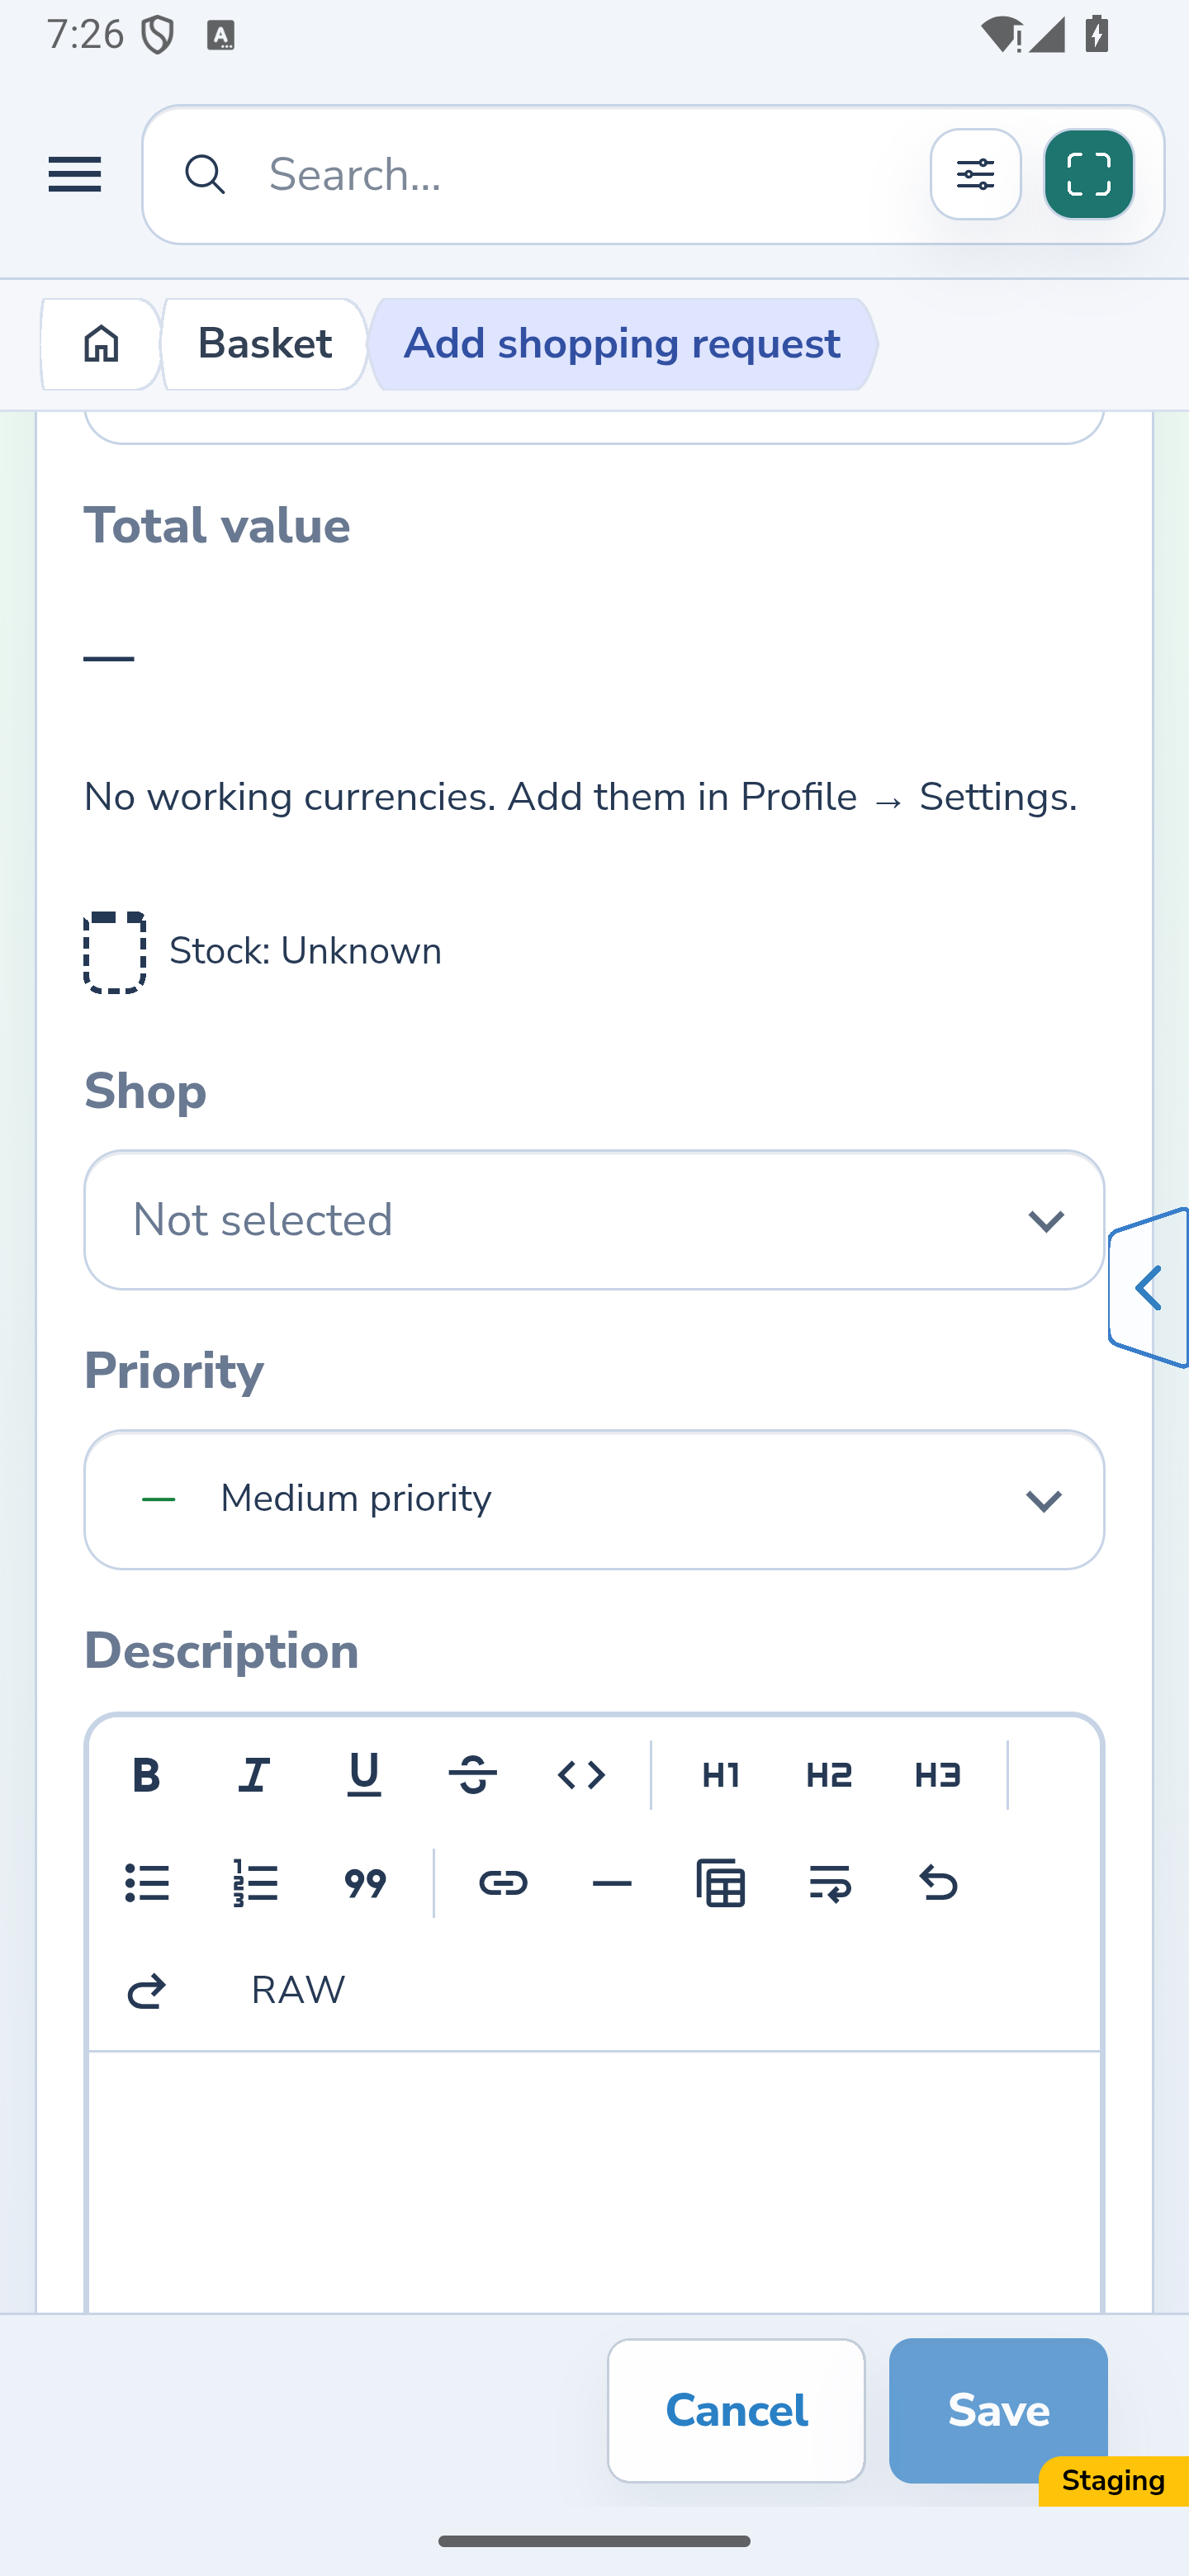
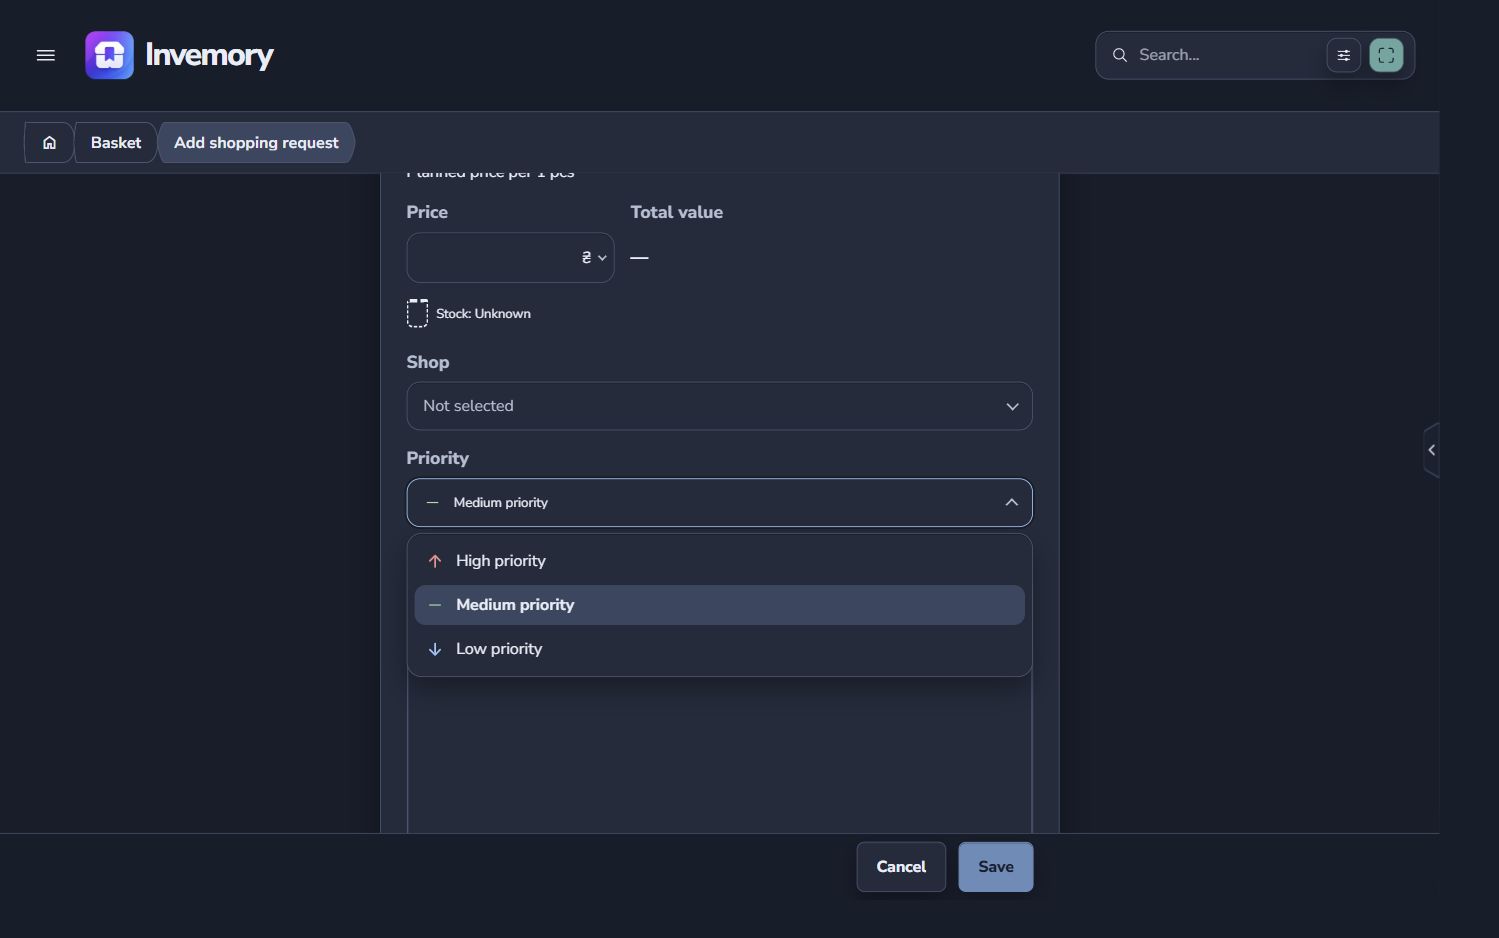
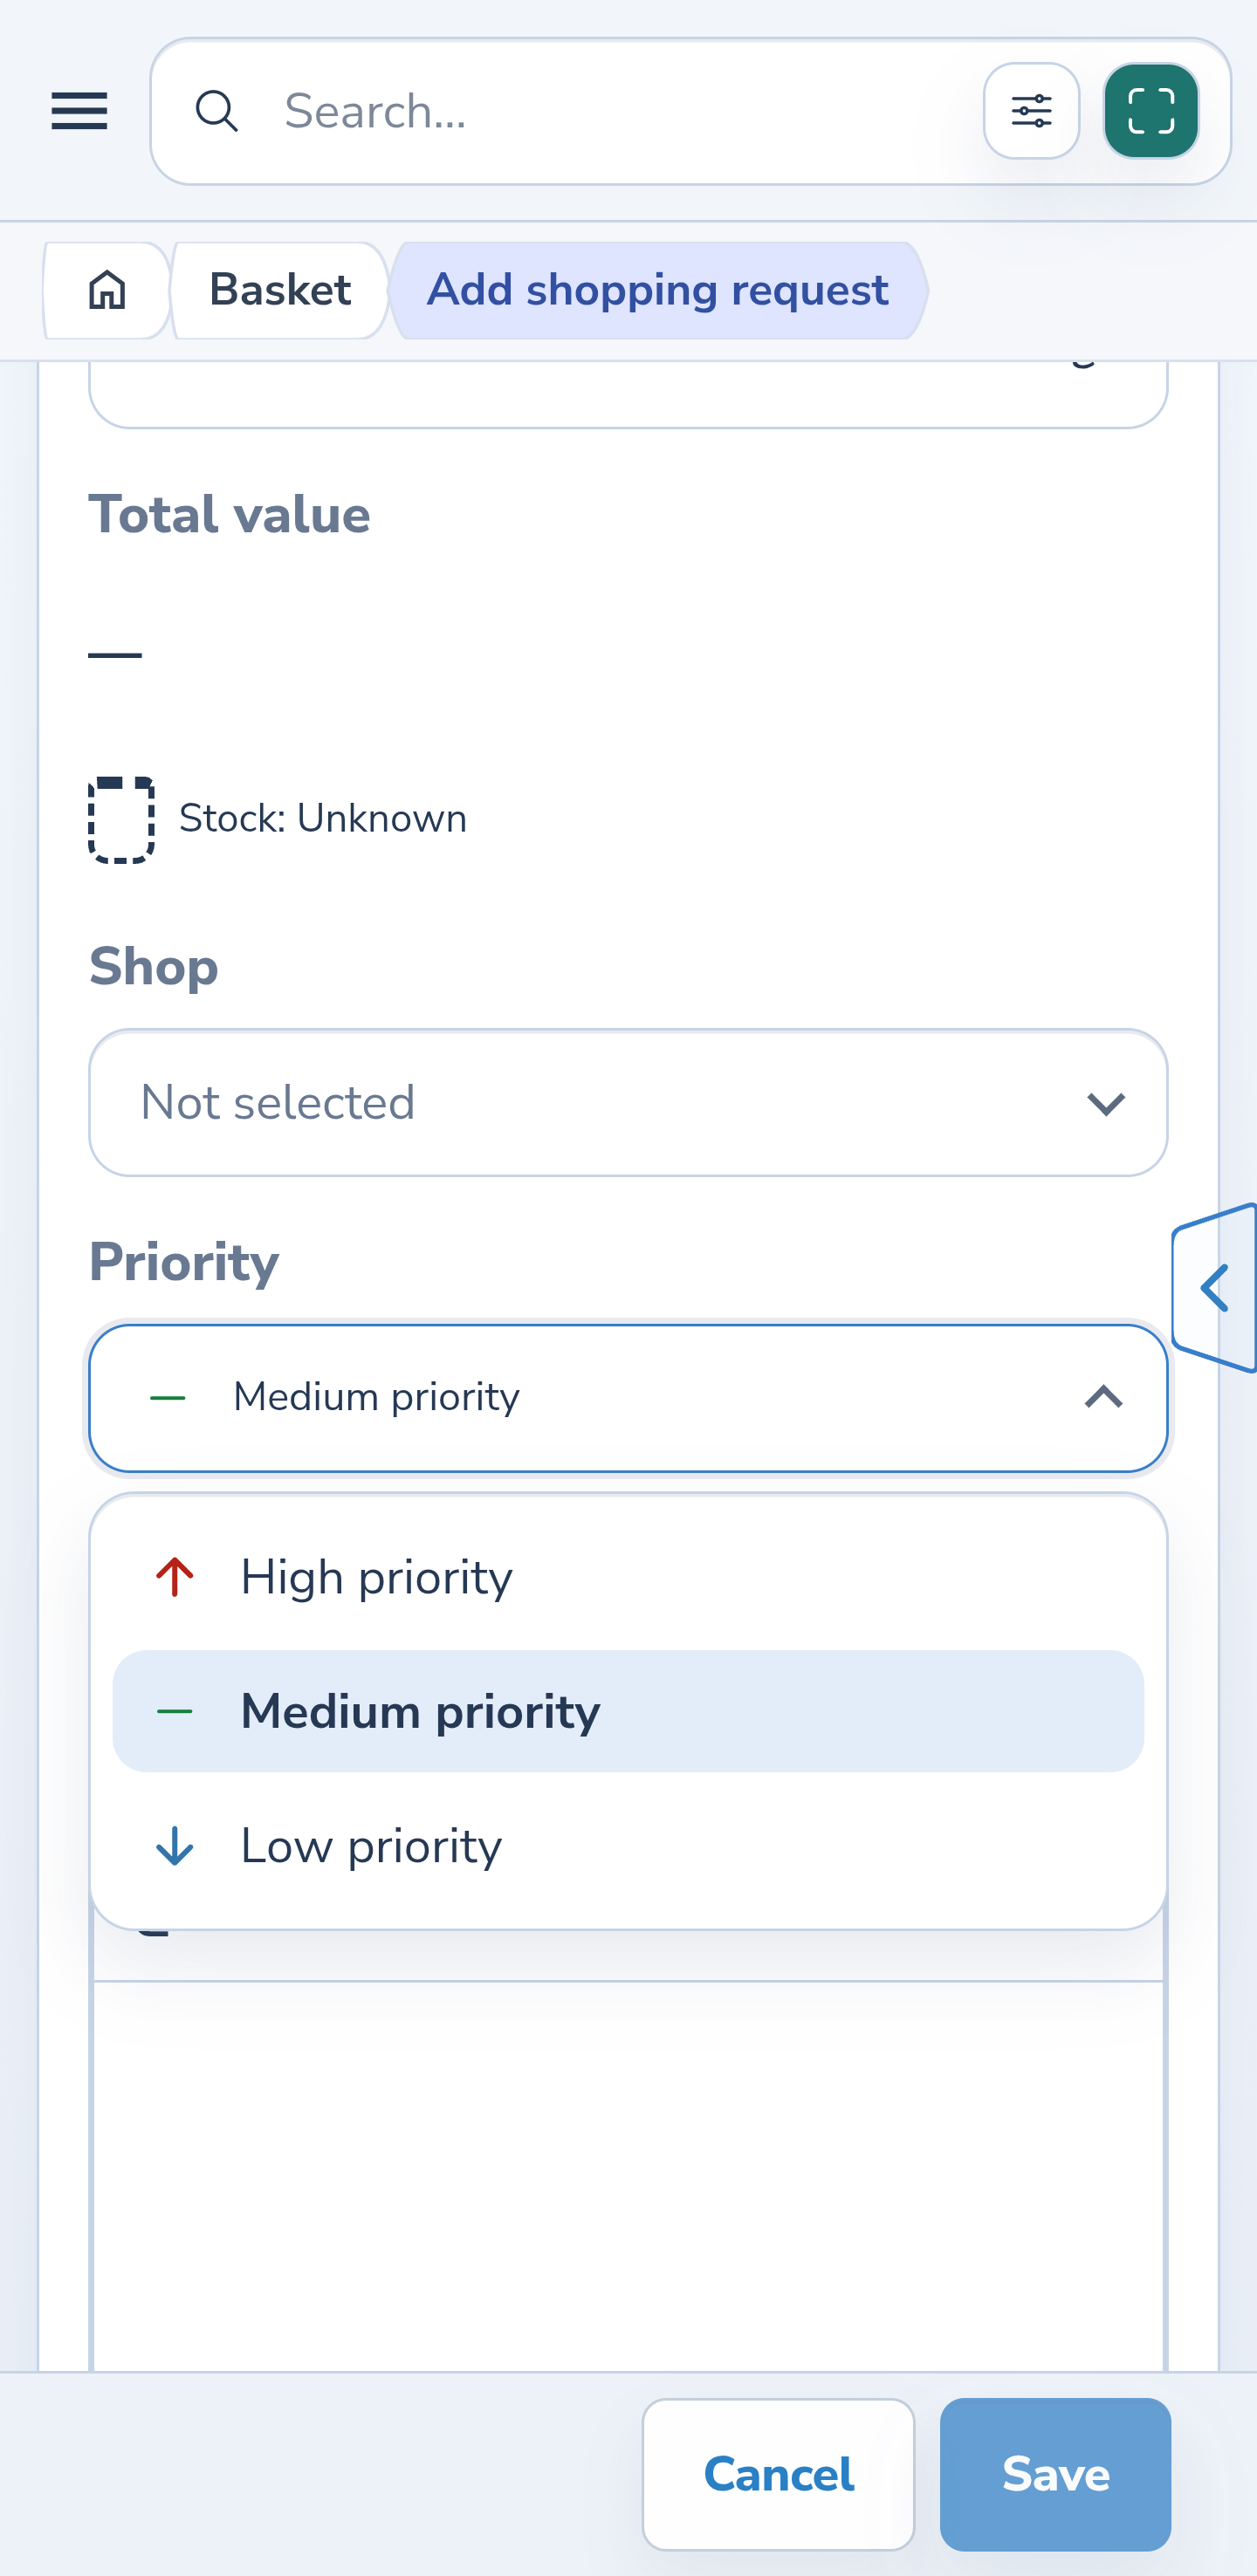
Open Add shopping request: a new manual draft starts with Medium priority selected. Open the Priority dropdown to see all three levels. The example shows a draft that was closed without saving.
In the open list, the current priority has a row background and a bold label. Both remain when you hover over or interact with the selected option. Keyboard focus on another option does not change the selection until you confirm it.
For an existing need, open Edit shopping request and check the selected priority in the same field. An automatic need’s quantity cannot be edited here; read the stock requirement in its location row.
Website
Android
Website
Android
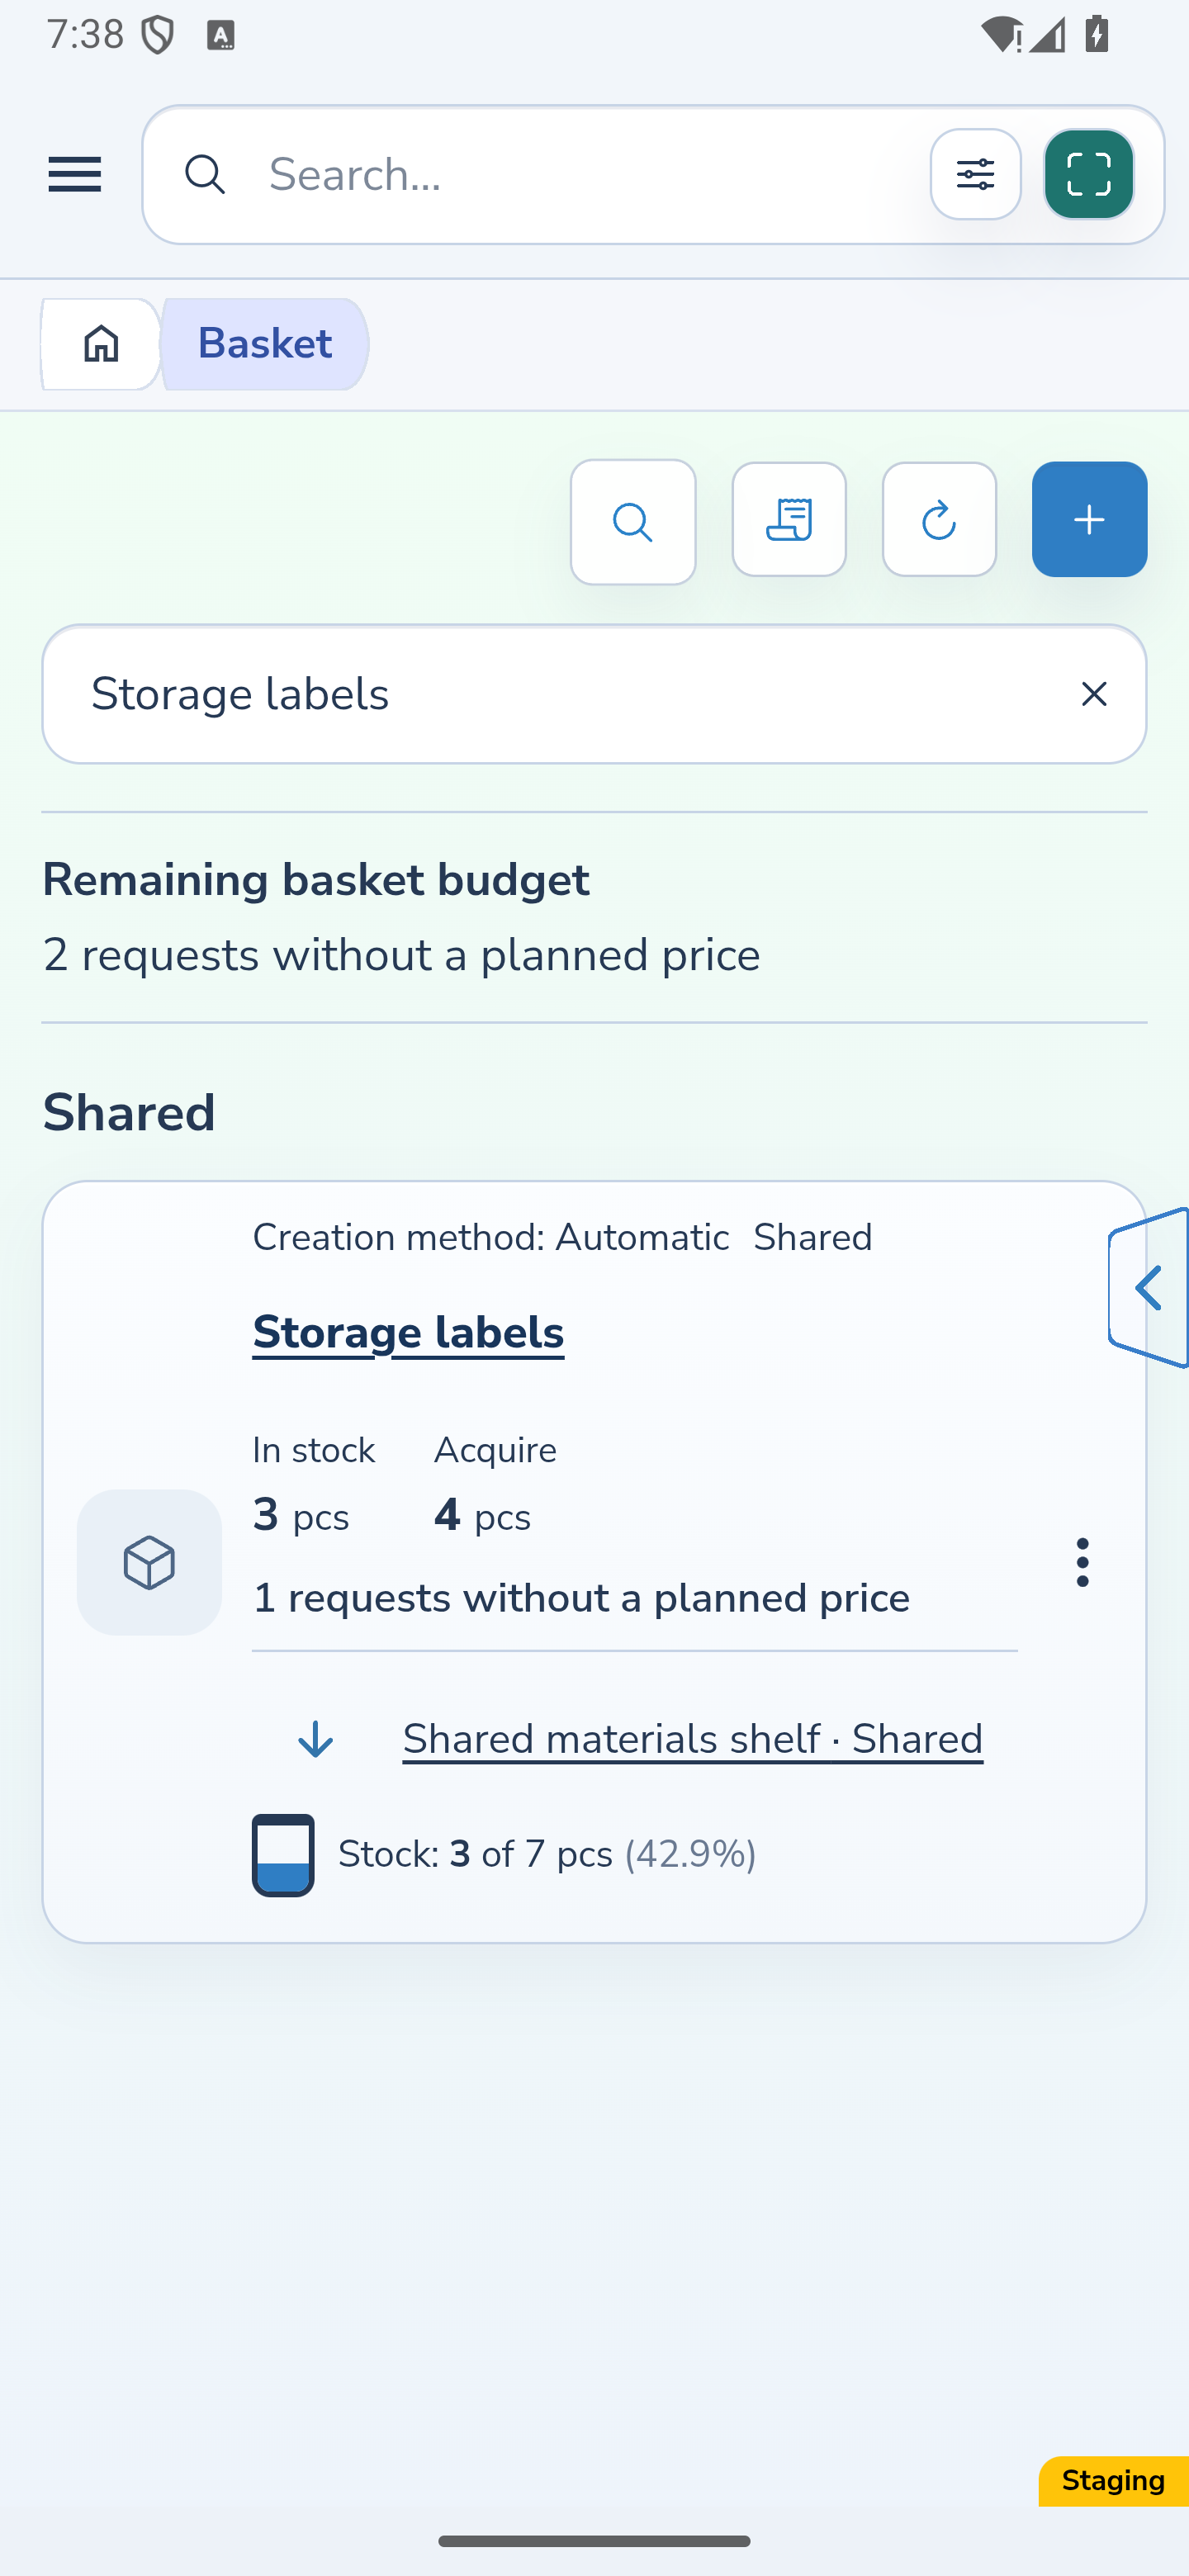
4. Check your access to a shared container
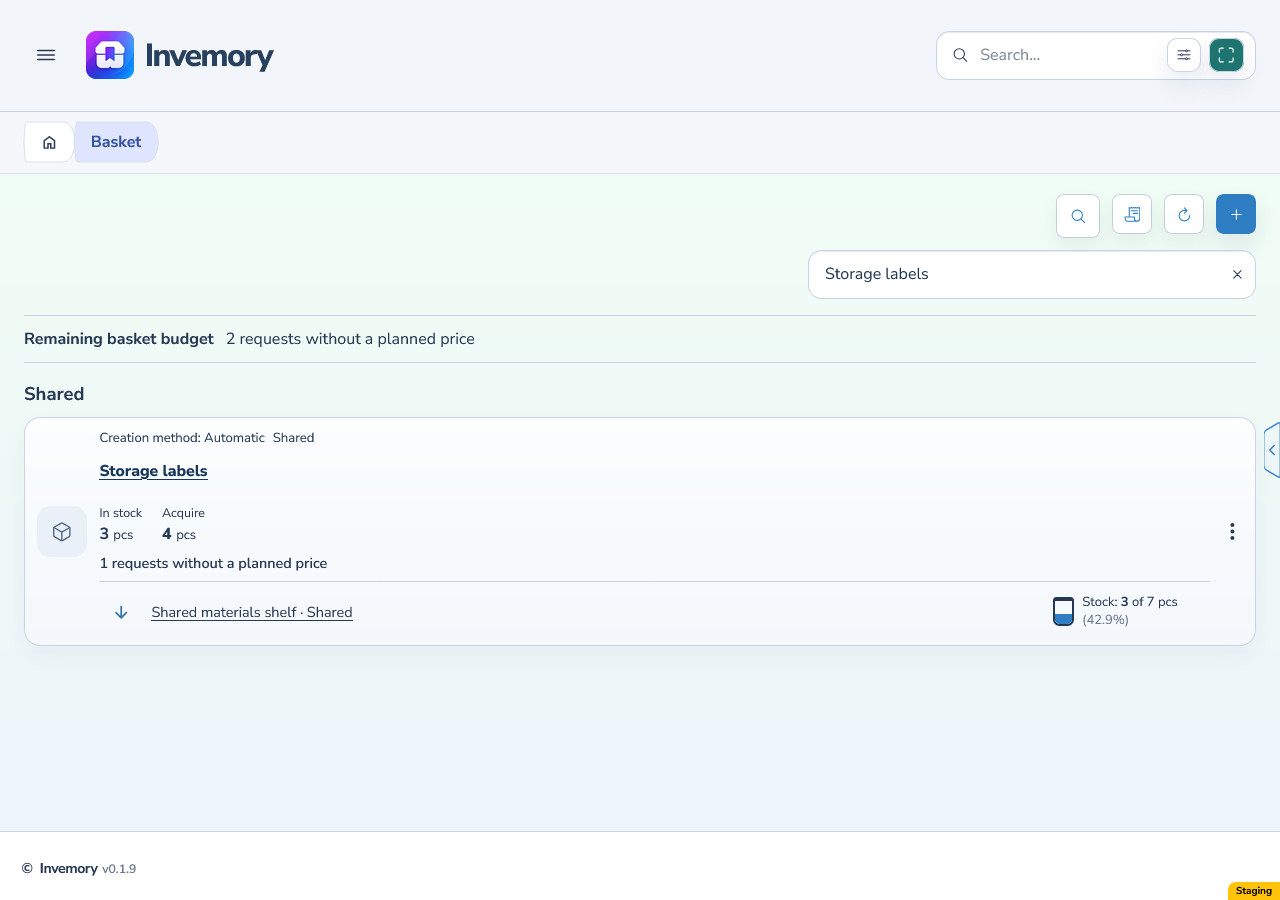
The view-only example shows a shared location, stock of 3 out of 7 and 4 units to acquire. The priority appears as an indicator with no button for changing it.
Being able to view a need or open its location does not itself grant permission to edit its priority. Check the available actions for the individual need.
Website
Android
5. Recognize priorities in your personal palette
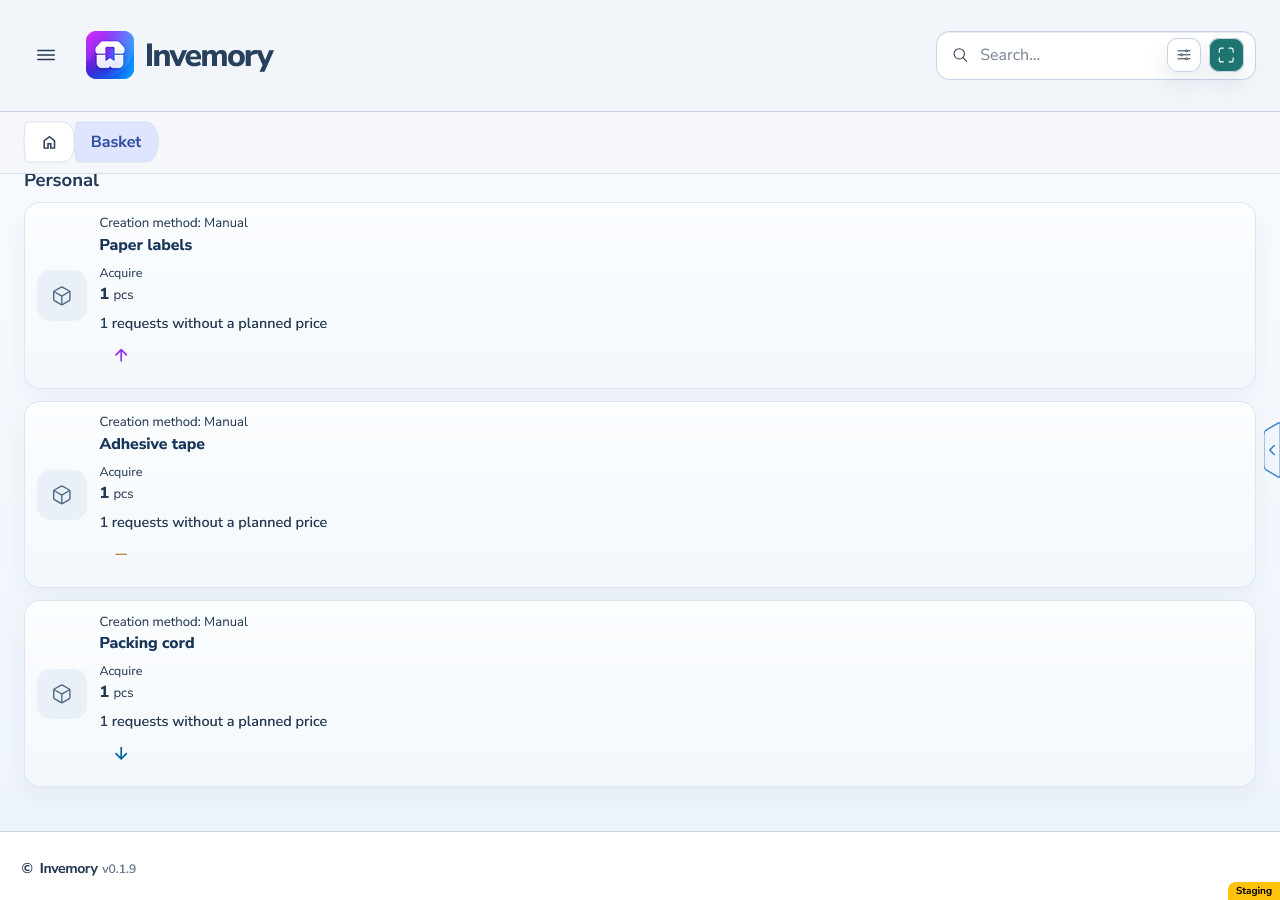
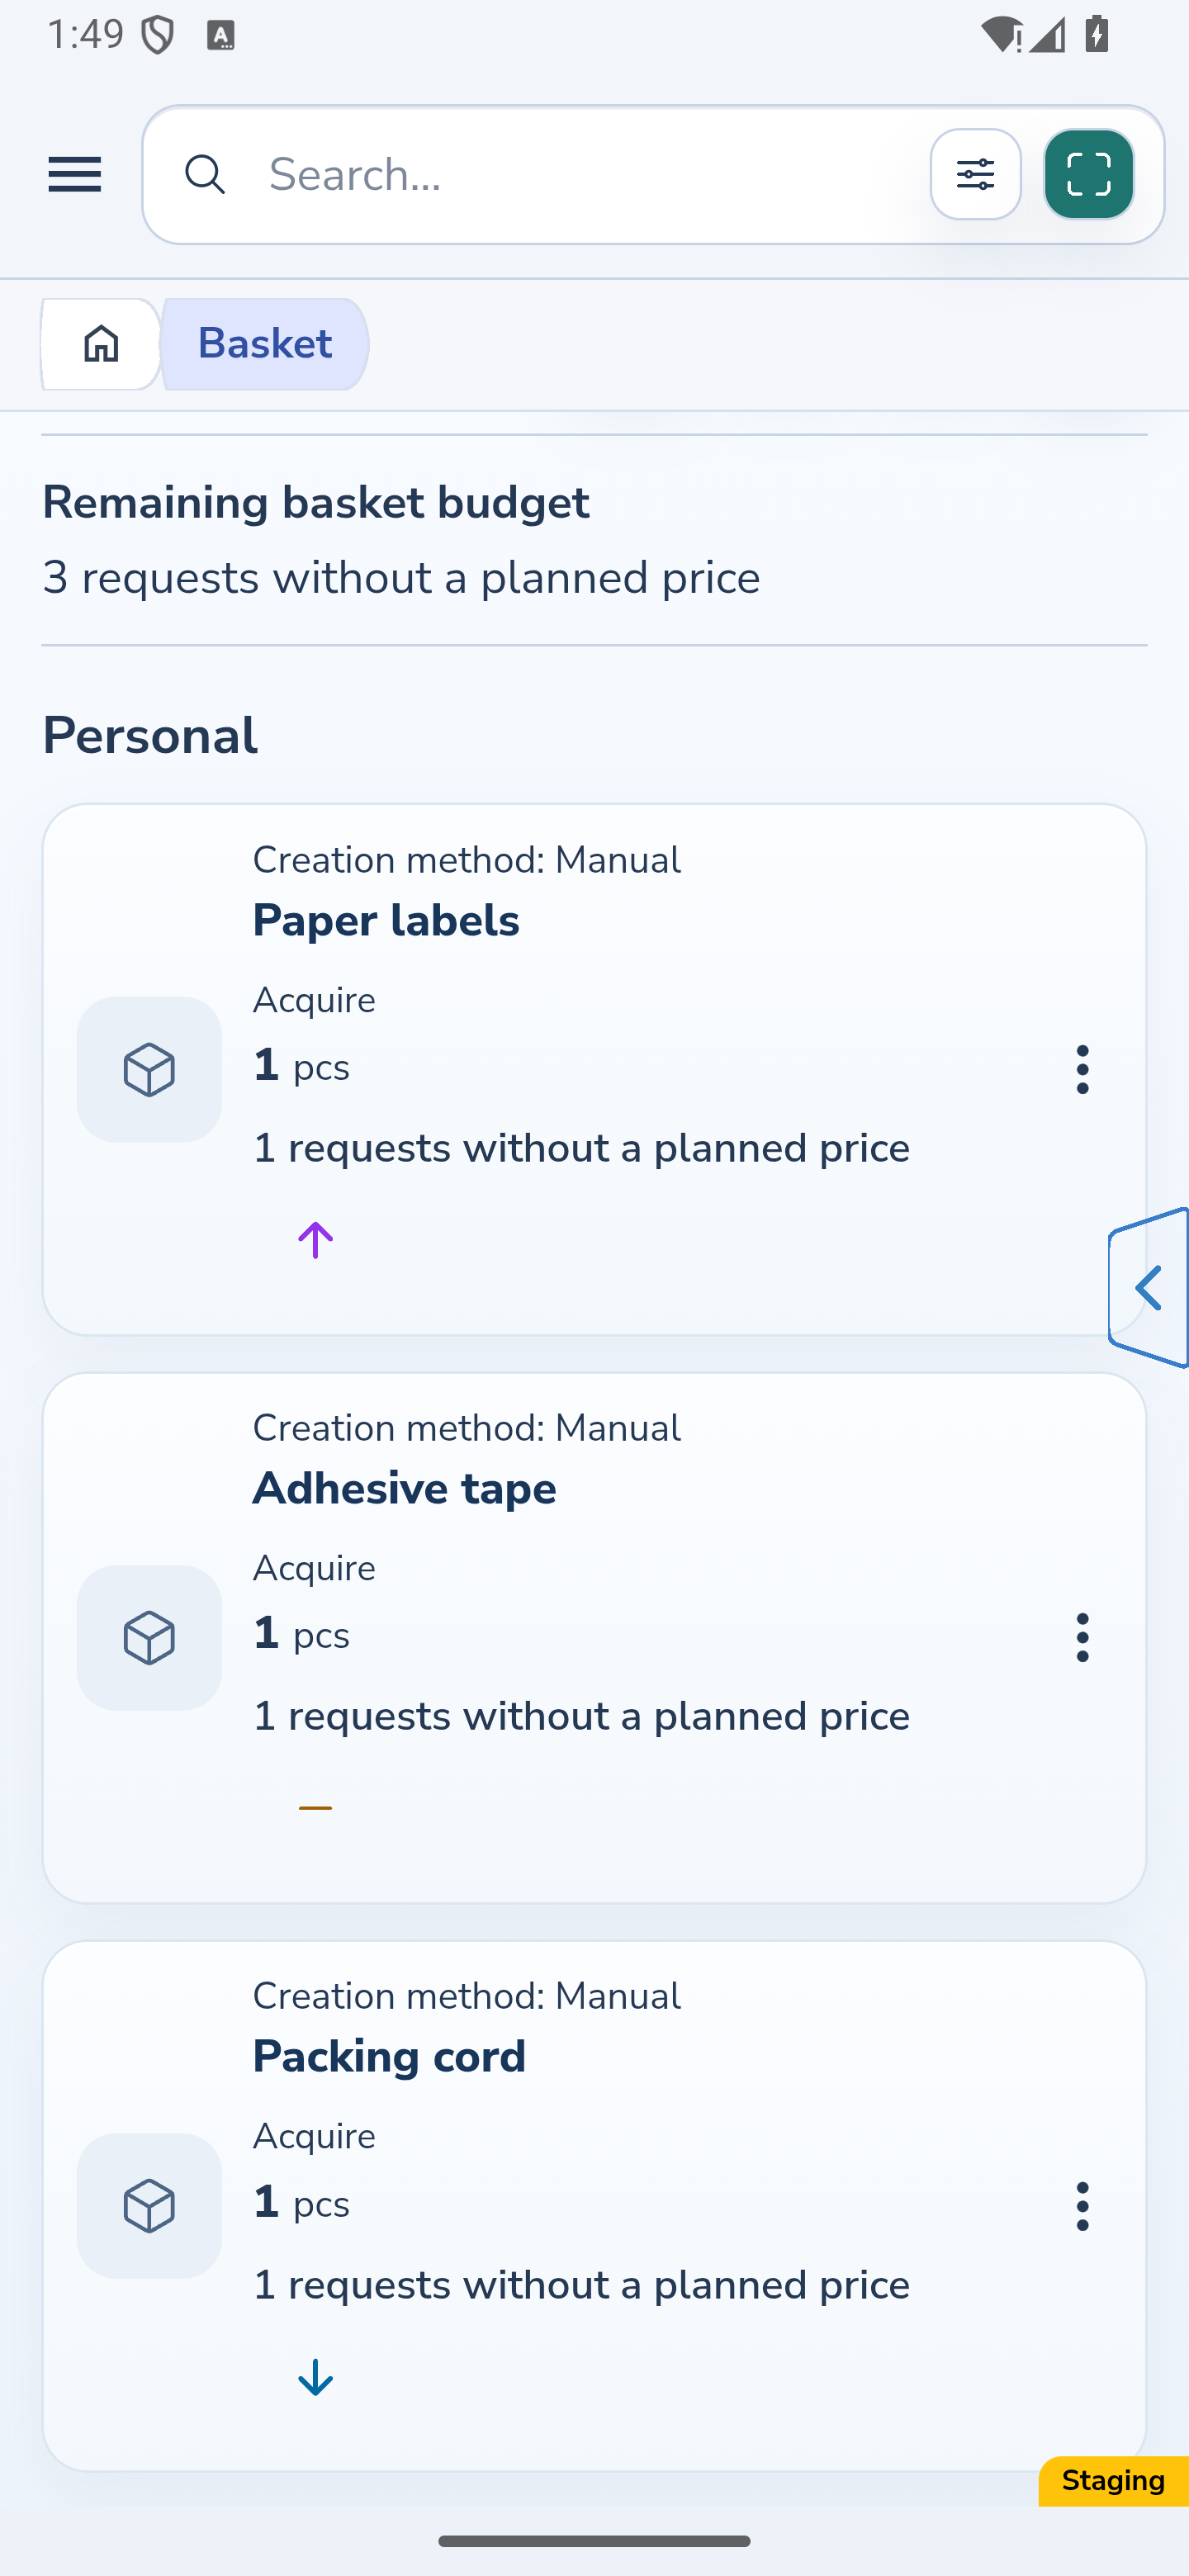
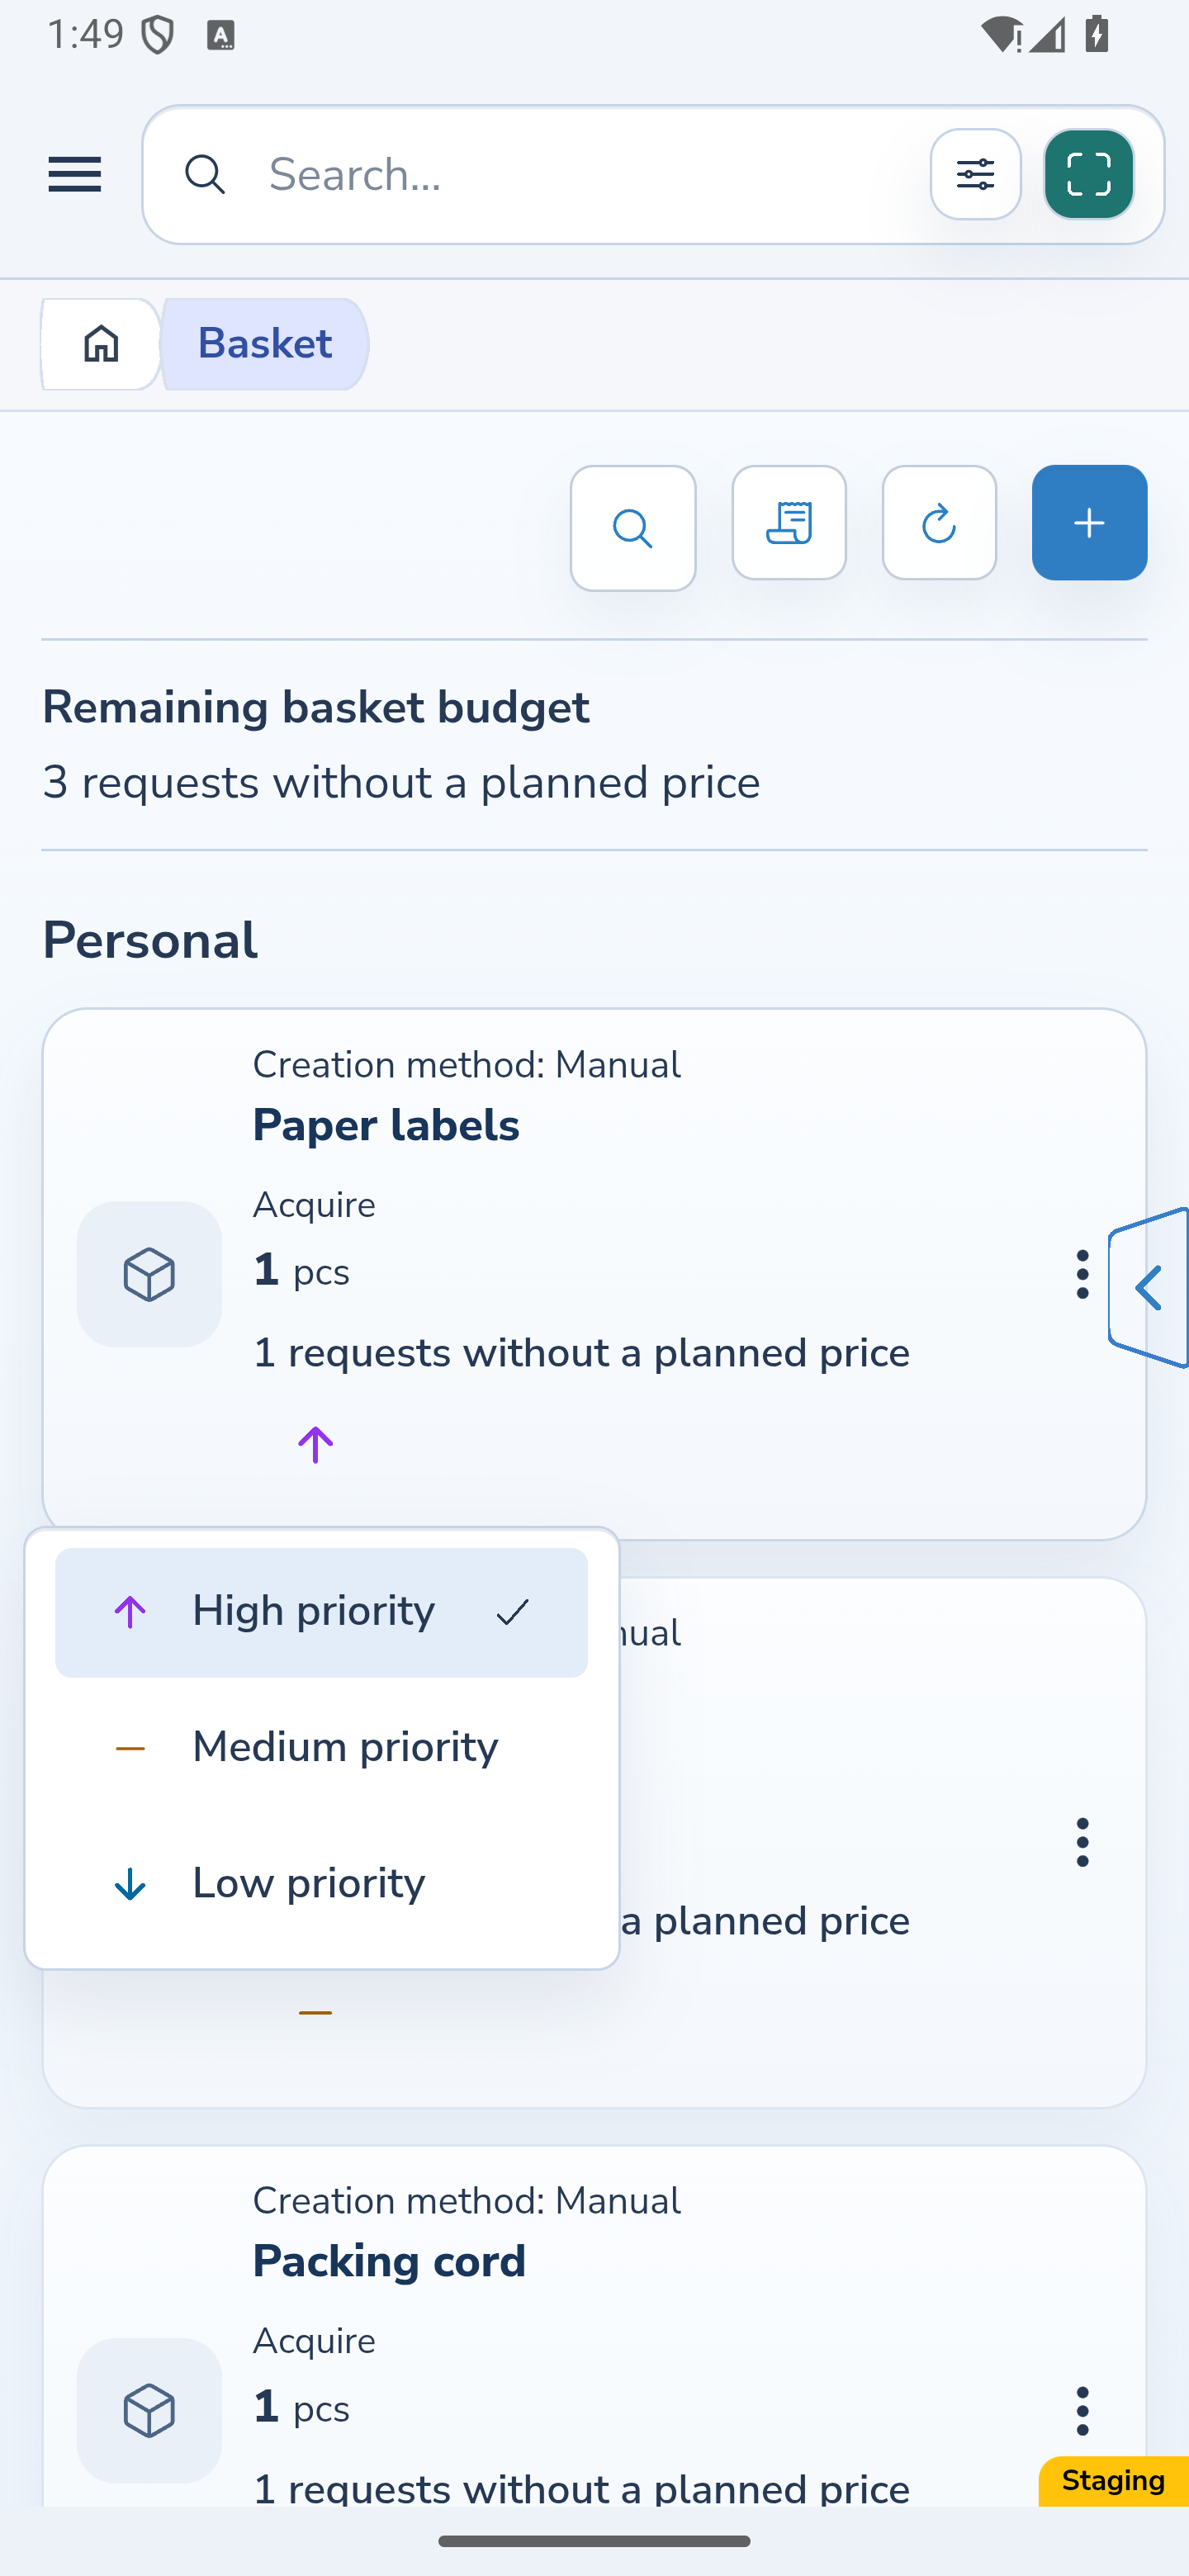
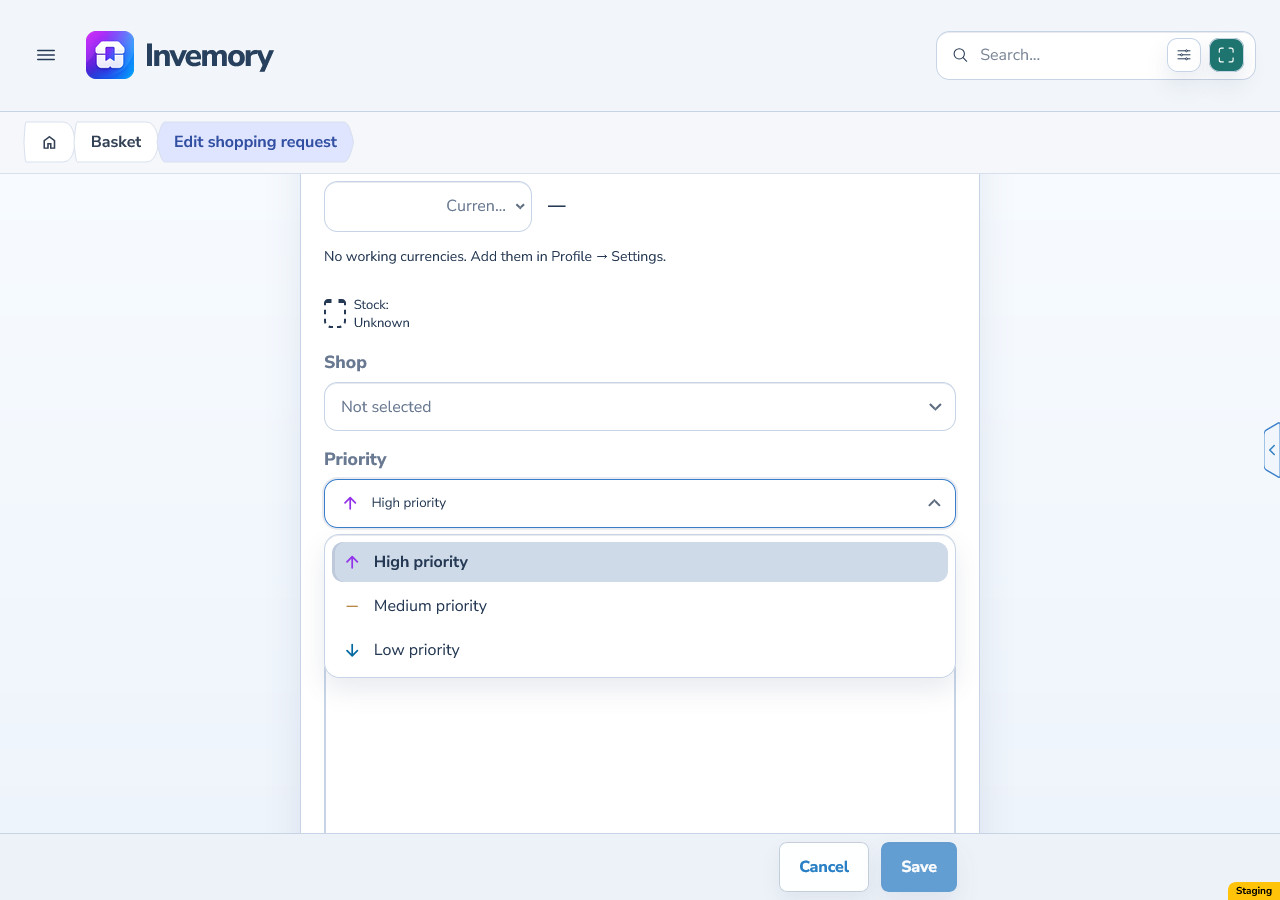
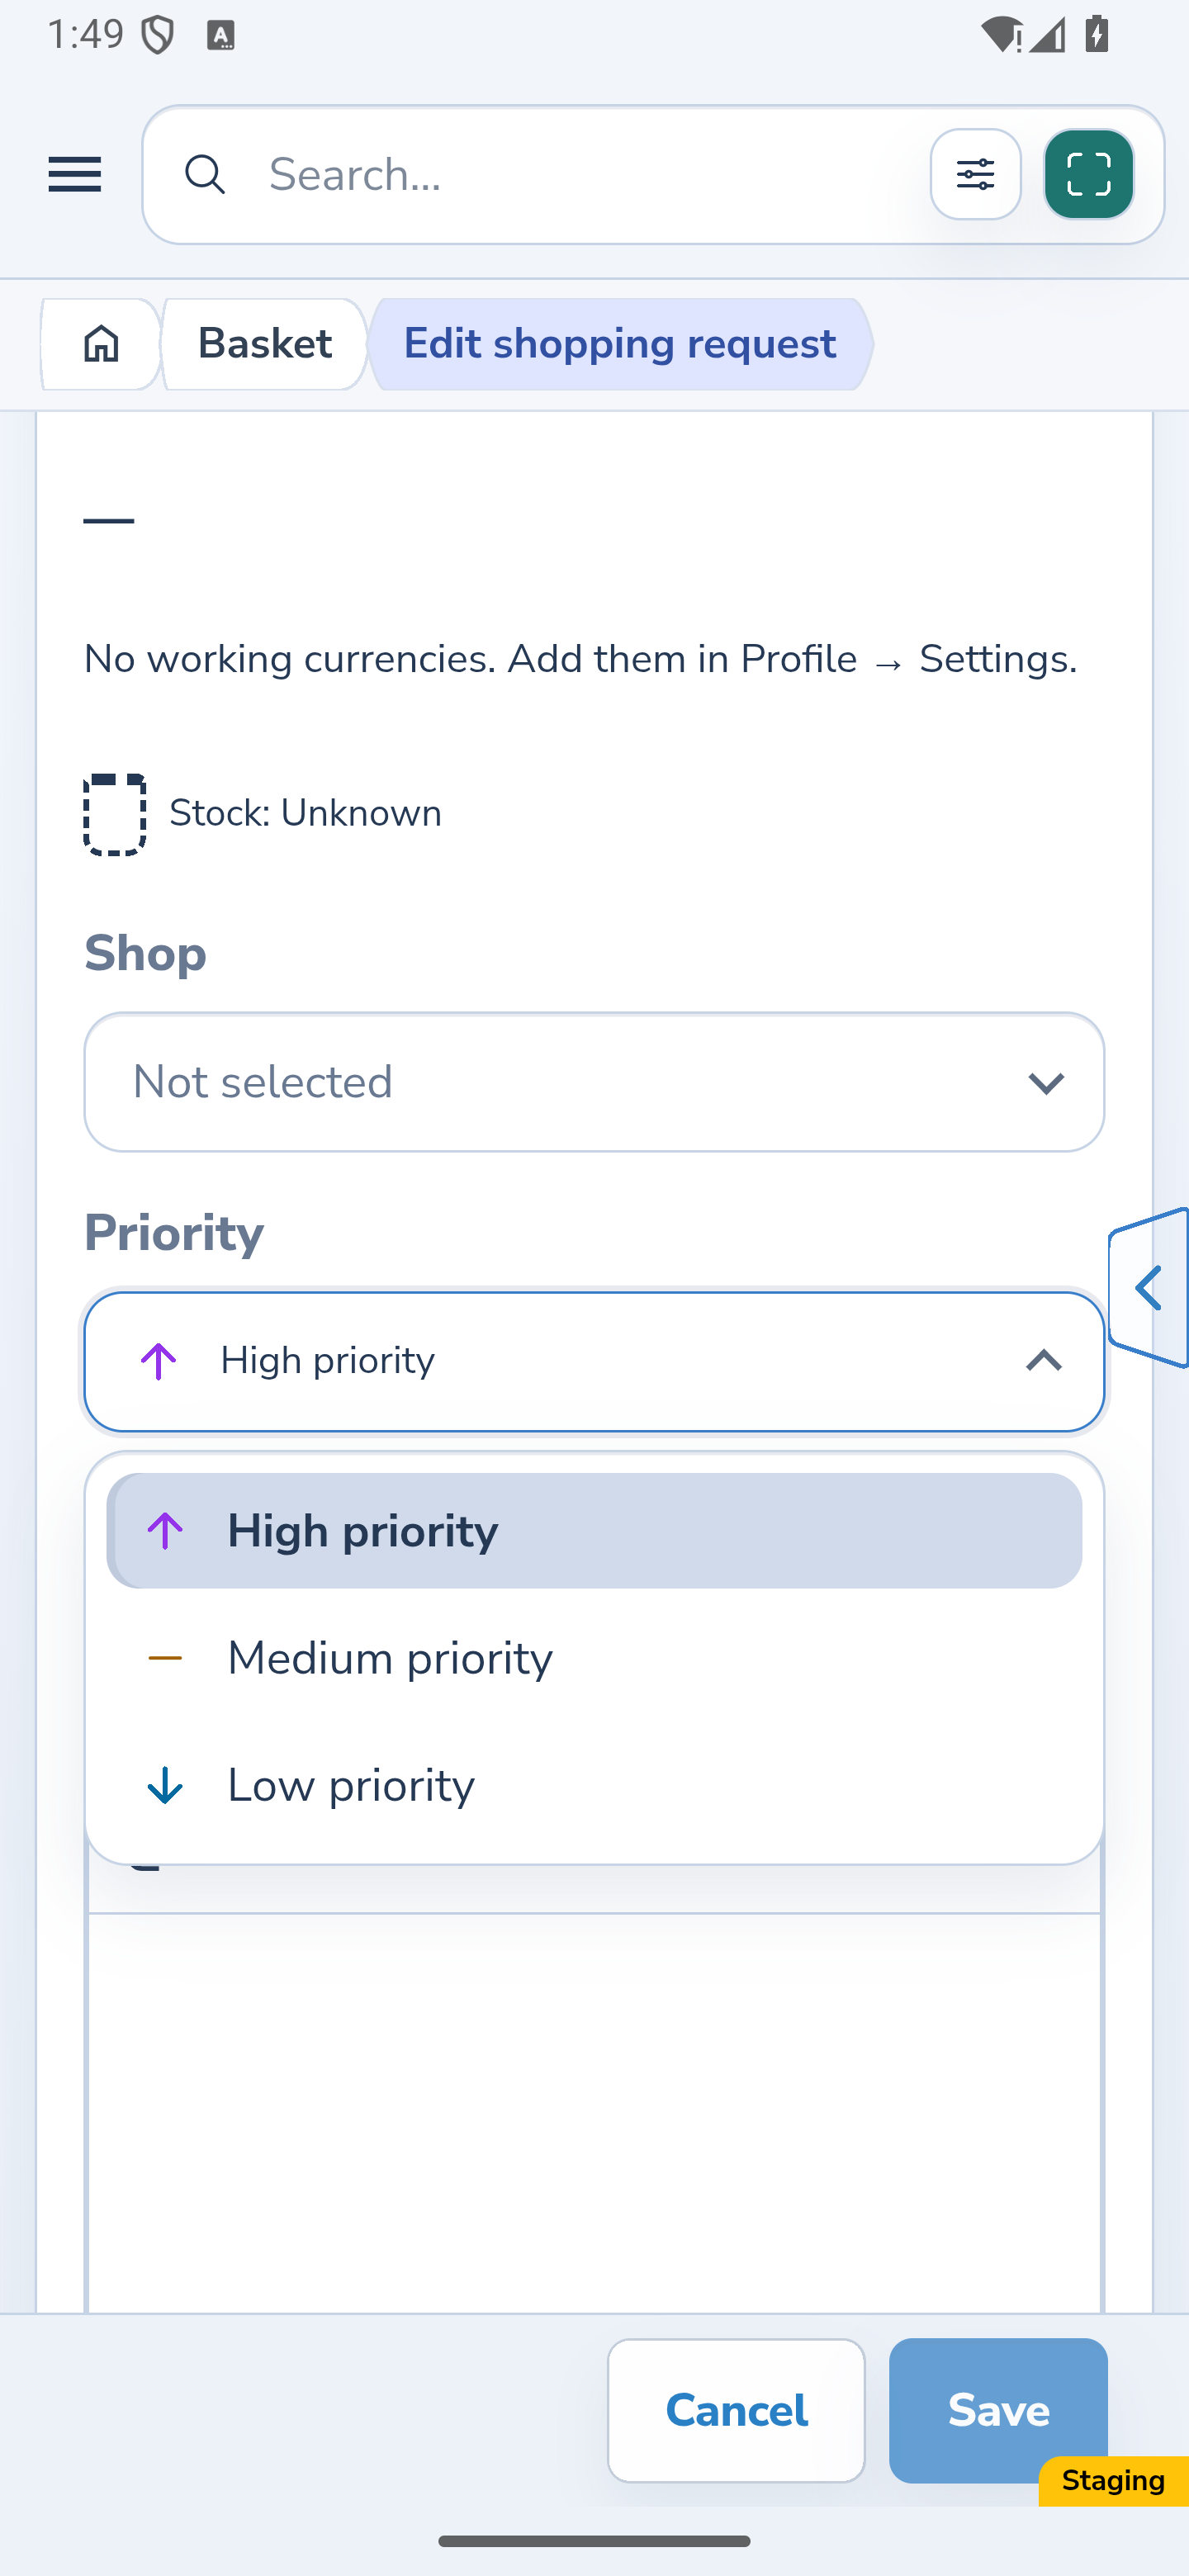
A personal palette may use different colors from the standard scheme. The separate example below shows manual needs at three priority levels, their menu and an editor with High priority selected. It uses different data from the automatic needs at the start of this guide.
The card, menu and editor indicators follow the current palette. Changing a color does not change the priority level. The Invemory appearance guide explains how to configure a palette.
Website
Android
Website
Android
Website
Android
6. Read the previous and new values in history
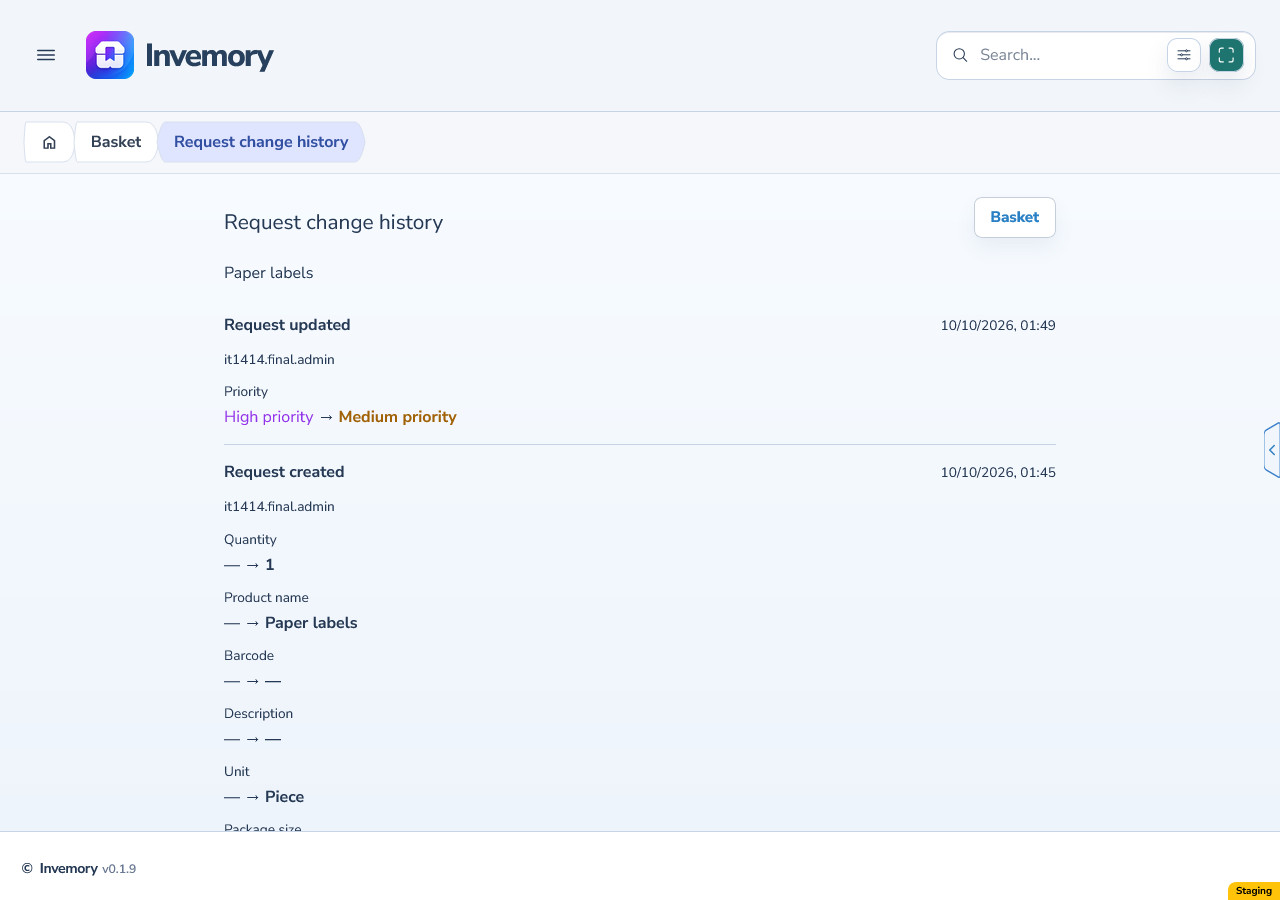
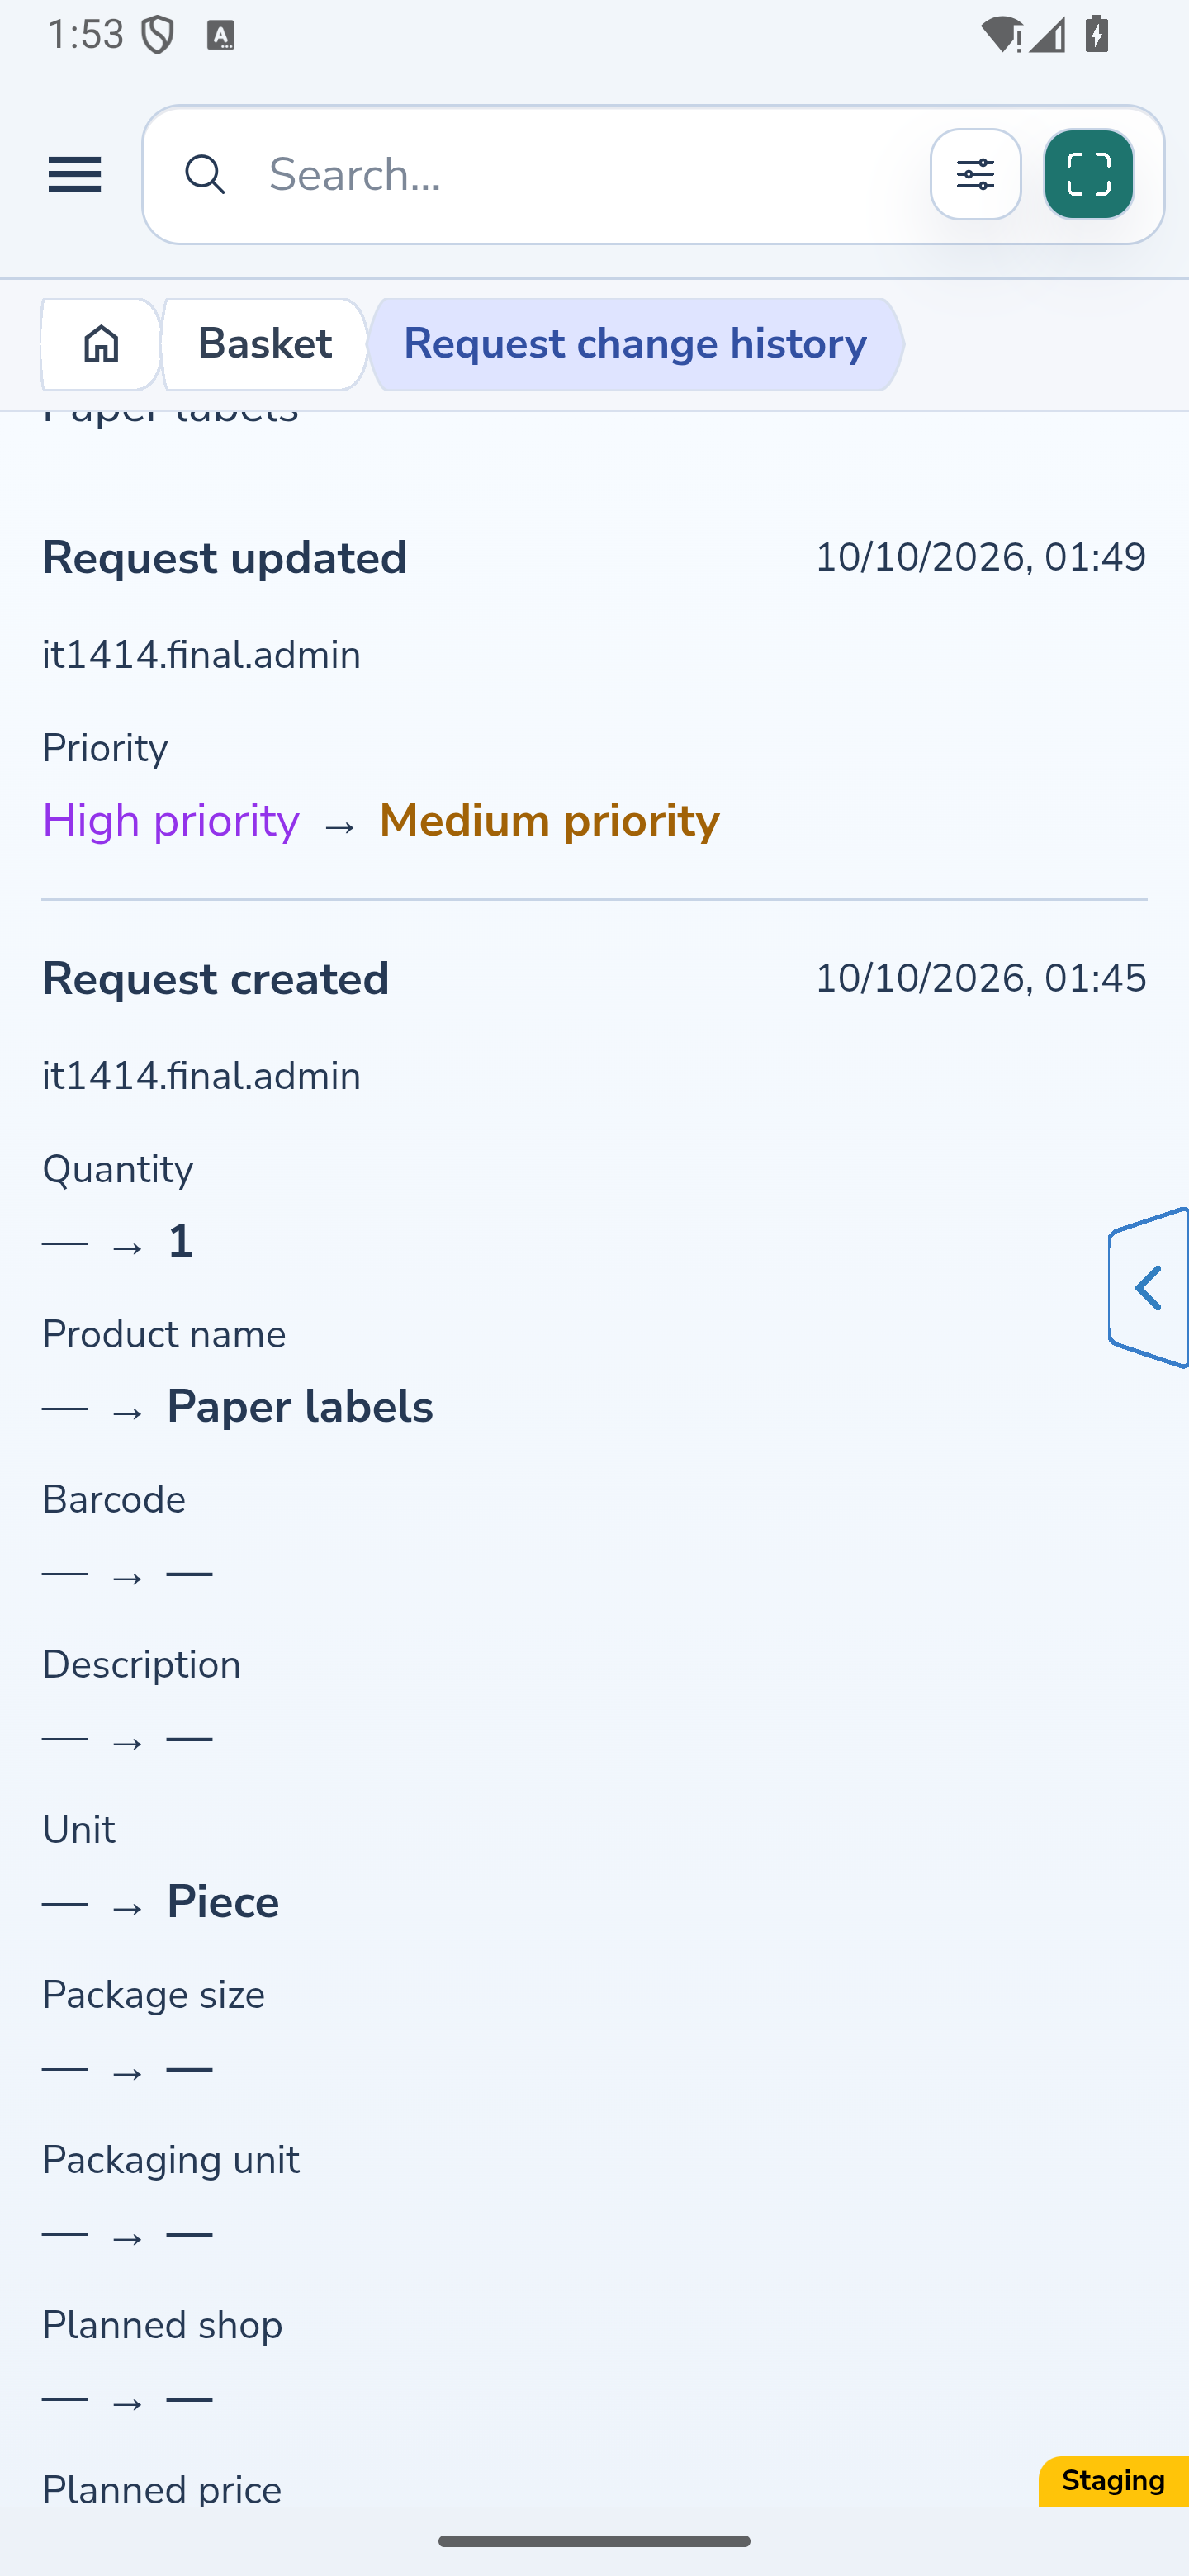
Open Request change history from the need’s actions or its editor. When a card groups several locations, choose the history of the intended target need. Check the date, author and values before and after the change.
The separate personal-palette example records a change from High priority to Medium priority. History retains the values, while their colored indicators follow the current palette. You can still read the change after choosing other colors.
Website
Android
The result
You can identify where a product is needed, read its current and desired stock and quantity to acquire, and, with editing access, change the priority and check its history entry.
Useful to know
- In a grouped card, compare each location’s stock with the total to acquire. Do not add source rows to that total.
- After a change on another device, reopen Basket to check its current state.
- For personal colors, choose clearly different shades and check the names and icon shapes.
Common questions
Why does an automatic need have a manually chosen priority?
Automatic origin and priority mode are independent. Choosing another level changes the priority while the creation method remains Automatic.
Why can I see a priority but cannot select it?
In the shared container shown with view access only, priority is an indicator. Changing it requires editing access to the individual need.
You can identify where a product is needed, read its current and desired stock and quantity to acquire, and, with editing access, change the priority and check its history entry.
Open Basket